


The developer of RegCleaner, jv16 PowerTools, Uninstalr, WinFindr, Startup Timer, ScreenshotX, System Examiner and Windows Update Fixer.
When you face issues such as sluggish performance, frequent Blue Screen of Death (BSOD) errors, or malware problems due to harmful software, you might be tempted to get a new computer and move on from all of these.
But before doing that, there are still some options that you can try such as Clean Install or factory reset using the “Reset your PC” feature. They might be similar at a glance, but one is more convenient than the other.
Reset your PC is a built-in reset feature from Windows where you can restore your system to its original factory settings state, without the bloats and unwanted software. The neat part though, is that it’s easy to do and there are different reset options you can choose from.
In this article, we’ll explain in-depth what this feature is all about and give you the step-by-step on how to use this on your computer.
Table of Contents
Reset your PC
As briefly mentioned in the previous section, Reset your PC is a built-in Windows operating system feature that allows you to perform factory reset a.k.a restoring your PC in its original factory settings.
It’s a great feature to use when you have system performance issues, software issues, malware infections, driver conflicts, or when you simply want to start fresh with your system.
Resetting your PC isn’t the same as restarting or rebooting your system. With the Reset your PC feature, you’ll be performing multiple steps of restoring your system to its factory settings, just like when you first receive your computer from the store. Meanwhile, restarting or rebooting would only require a button click and is basically turning your computer off and on again.
Though it may seem very similar to Clean Install, Reset your PC has two recovery options/types of reset that aren’t available in Clean Install which are:
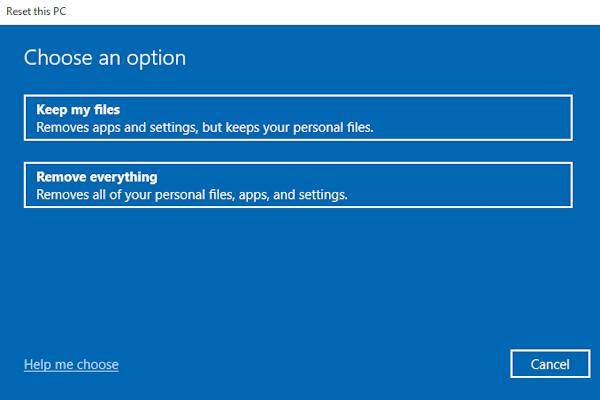
- Keep my files
Also known as “refresh”, this option will reinstall Windows, remove installed apps and saved settings, and allow you to keep your personal files such as documents and photos. - Remove everything
Also known as “reset”, this option will reinstall Windows, and remove installed apps, saved settings, and personal files.
In addition, Reset your PC also has two reinstallation methods which are:
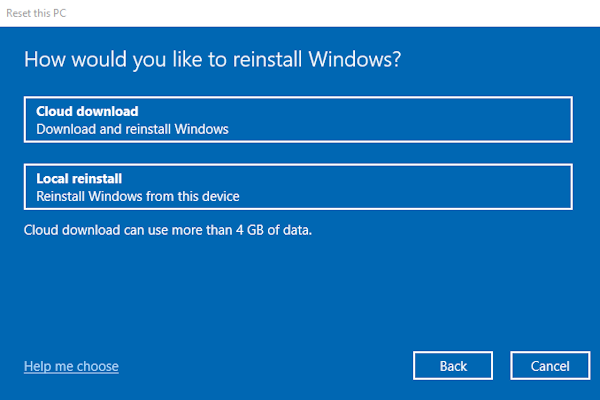
- Cloud download
This reset option will download a fresh copy of Windows from the cloud so you can get the latest Windows version and software updates. Bear in mind that you need an active internet connection for this. - Local reinstall
This reset option will reinstall Windows using files that already exist on your computer.
Keep in mind the above options before using Reset your PC, and choose the options that suit your situation best.
What to prepare before using Reset your PC
Before using the Reset your PC feature, you need to take some safety precautions such as:
- Create a backup of your important data, personal files, passwords, browser bookmarks, settings, etc preferably using a 3-2-1 backup strategy. This basically means that you need to create three data copies on two types of storage (such as using a USB flash drive and cloud backup service) in at least one off-site location.
- Since Reset your PC will remove all of the installed programs, you need to create a list of programs that you want to reinstall.
- If you choose “Keep my files” as a reset type, you’ll need to make sure that you have the password associated with your Microsoft account because you’ll be prompted to log in.
- Make sure you have an active internet connection, especially if you want to keep your files and opt for Cloud download as a reinstallation method.
How to use Reset your PC
There are two different ways to access Reset your PC feature, from Windows settings or boot menu. Below is the step-by-step guide on using Reset your PC using both options.
Using Reset your PC through the Windows settings app
Here’s how you can use Reset your PC feature from the Windows settings app:
- Open the Settings menu by looking up “Settings” from the Windows search bar or clicking the Windows start button > clicking the gear icon.
- In the new window, select the “Update & Security” menu.
- In the new window, select “Recovery” from the left sidebar.
- Click the “Get started” button under the “Reset this PC” menu.

- Select one of the recovery options. If you’re not sure which, you can click the “Help me choose” option on the bottom left of the window.
- Next, choose the reinstallation method. If you’re unsure whether you want to choose cloud download or local reinstall, you can click the “Help me choose” option on the bottom left of the window.
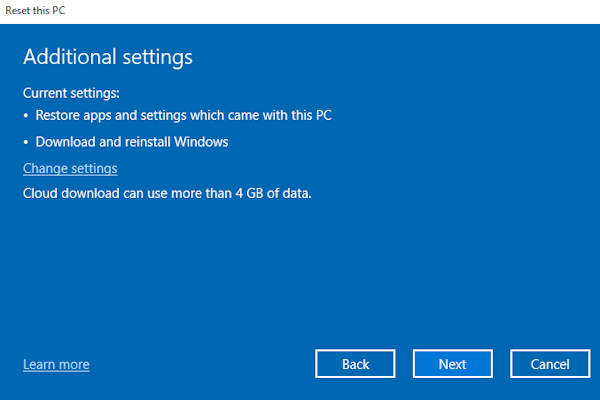
- Review additional settings on the next screen then click the “Next” button.
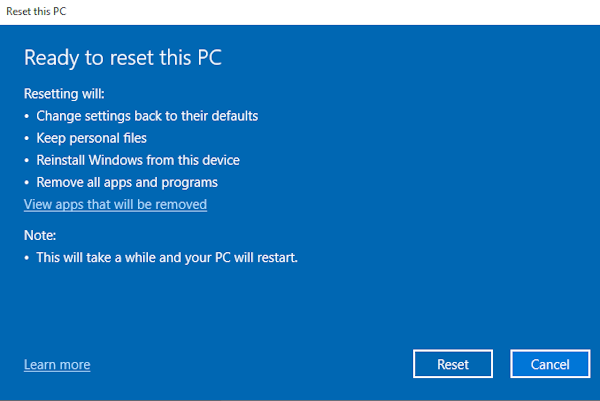
- Review the summary of reset instructions. If everything looks good to you, click the “Reset” button.
- Wait until the factory reset process completes and follow the instructions after reinstallation.
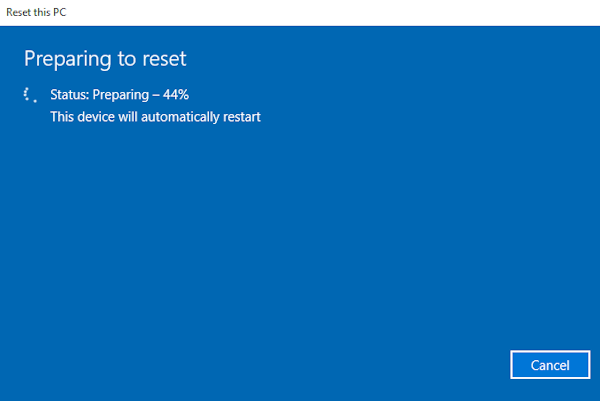
Using Reset your PC through the boot menu
You can also use the Reset your PC feature through the boot menu. Here’s how:
- Access the boot menu by holding the shift button while performing a restart (by clicking the Windows button > clicking the power button > selecting restart).
- In the boot menu, select “Troubleshoot”.
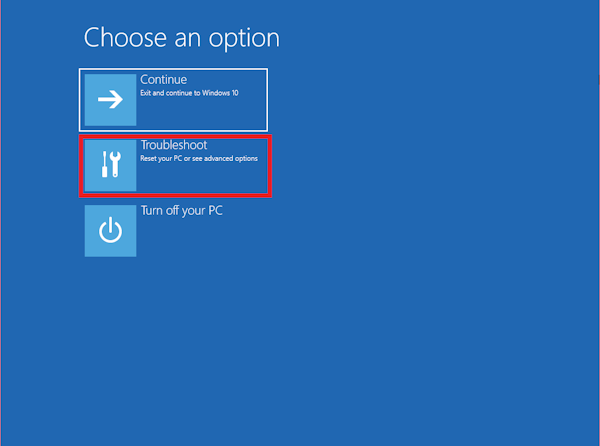
- In the new screen, select “Reset this PC”.

- Select one of the preferred reset options. If you’re not sure which, you can refer to this help article from Microsoft.
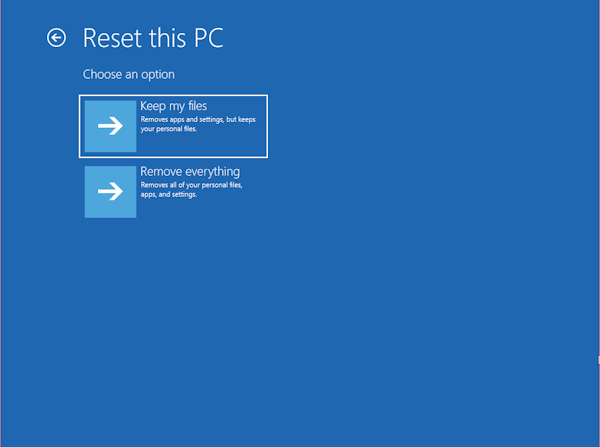
- Your PC will restart and after that, a new screen will appear. If you choose the “Keep my files” option, you’ll be redirected to the Microsoft login screen, so you need to make sure that you remember the password associated with your account. Otherwise, you’ll be redirected to a new screen.
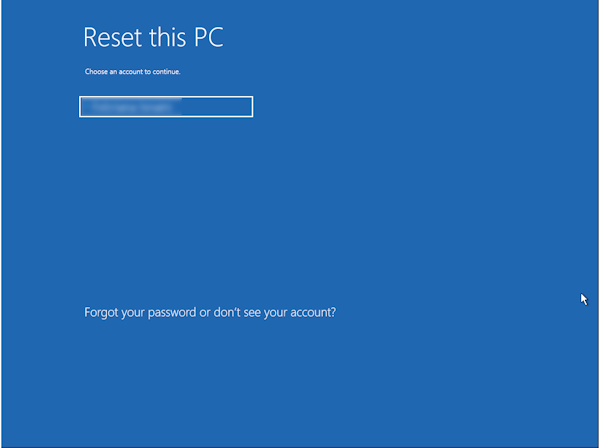
- In the next screen, select the reinstallation method. If you’re unsure whether you want to choose cloud download or local reinstall, you can refer to this help article from Microsoft.

- Review the summary of reset instructions. If everything looks good, click the “Reset” button.

- Wait until the factory reset process completes and follow the instructions after reinstallation.

What to do after using Reset your PC
There are some additional things you can do after resetting your PC, such as:
- Run initial system updates and then regularly check for new updates by accessing the “Windows Update” menu from the settings app. You can also adjust how and when you want to install updates under the ‘Advanced options’ menu in Windows Update.
- Make sure that you have the latest version of drivers after reset. You can do this by following the instructions in this help article.
- In the case where you’re using Reset your PC to fix malware issues, you can prevent this from happening again in the future by using antivirus software. Windows has a good built-in antivirus software called Windows Security and you need to make sure that it’s been activated. You can check this by accessing the Settings menu > Windows Security > Virus & Threat Protection. You can check for current threats by clicking the “Quick scan” button in the virus & threat protection menu.
- Since Reset your PC will remove all installed apps, you need to reinstall important programs listed in the previous step.
- If you don’t choose “keep my files” during factory reset, you can transfer back all of the file backups.
Conclusion
Reset your PC is a neat built-in feature in Windows for when you want to perform a factory reset of your computer. It’s slightly different from Clean Install – with Reset your PC, you still have the option to keep your documents, photos, and other personal data after reinstallation.
Since Reset your PC will wipe out all of the installed apps and the factory reset process will require some preparations from your end, you need to make sure to use this feature only when it’s appropriate. It’s also important to create a backup using the 3-2-1 method since there’s always a risk that things don’t go well during the reset process.
Thanks for reading, and you can bookmark this guide for future reference or share this on your social media if you find it useful!