The developer of RegCleaner, jv16 PowerTools, Uninstalr, WinFindr, Startup Timer, ScreenshotX, System Examiner and Windows Update Fixer.
Taking screenshots is an essential skill everyone must know.
There are different devices and different operating systems, which all have their own methods to take screenshots. You all may know how to take a screenshot on an Android mobile device by holding the power button plus volume down key together. It’s pretty straightforward on Android.
When it comes to Windows 11 or Windows 10, there is more than one way to do a screen capture. The numerous methods to take a screenshot include capturing the entire computer screen or just a selected part of the window. Screenshots can be helpful for a variety of reasons. You may need it to keep a record, to show someone what’s happening on your screen, or to help solve an error with tech support.
The basic ways include using the game bar, print screen key, and snipping tool. All of them have their pros and cons. Some are faster, but some allow you to capture a specific part or edit it after capturing your screenshot.
Let’s look into each way one by one and discuss their benefits.
What is the keyboard shortcut for the screenshot?
The easiest and most convenient way to take a screenshot in windows is by using the Print Screen Key. This key can be found on the top row, usually beside the F12 key. It may be named PrtSc, PrtScn, PrintScreen, or Print Scrn button depending on the keyboard you are using.
How to take a screenshot by print screen key:
Take a screenshot of the whole screen
By simply pressing the PrtScn button once, the system automatically takes a screenshot of the entire screen. When you press the print screen button, nothing seems to happen, but windows have taken the screenshot of your entire screen and copied it to the clipboard. You can then paste the copied screenshot anywhere from the clipboard, such as an image editor application like Microsoft Paint or any program that supports images like Microsoft Word. You can simply press Ctrl + V to paste.
On some laptops, pressing the print screen key alone doesn’t work, you need to hold the function key and then press the print screen key.
Take a screenshot of only the active window
Sometimes you may require to take a screenshot of only the active window instead of the full screen. For this, you need to use the keyboard shortcut Alt + Print Screen key. This will copy the screenshot of the active window to the clipboard, and you can paste it anywhere.
Automatically save your screenshot
You may require to take a screenshot and save it automatically. For this, you need to press and hold the Windows key (the button with the Windows logo) and then press the PrtScn key to save the entire screen as an image. This image can be found in the Screenshots folder, which can be found in the Pictures folder. This procedure is useful when you want to save your screenshot in a folder for later use. You can anytime access the pictures screenshots from the screenshots folder.
All of these methods are applicable to both windows 10 and windows 7. They both have the same features regarding when taking screenshots with Print Screen.
How to take a screenshot by Game bar:
The game bar or Xbox Game Bar is an overlay that can be used to capture screenshots or record videos. The tool is already preinstalled on Windows and works on almost all games, apps, and software.
You can enable the game bar by typing “Enable Xbox Game Bar” from the Windows search bar then toggle on record game clips, chat with friends, and receive game invites.
Here’s how you can capture a screenshot with the game bar.
Step1) Bring up the desired window, game, screenshot screen or application of which you want to take a screenshot.

Step2) Press and hold the windows key, and then press “G”. The game bar overlay will appear.

Step 3) Click on the camera icon, located on the top left side, under “Capture.” This will take a screenshot of the active window. The shot screen and video clips captured will be saved in PNG file format. You can find them in the “Captures” folder located in the “Videos” folder. This does not copy the pictures of the screenshots to the clipboard.
You can also take a screenshot of an active game screen by pressing the windows key, the Alt key, and then the PrtScn key together. Taking a screenshot using the game bar with this keyboard shortcut is much faster.
How to take a screenshot by Snipping Tool:
Snipping Tool is a screenshot tool that comes preinstalled with Windows 10.
This utility is also available on Windows 7 and Windows Vista. It comes installed with both versions of windows. This utility allows you to snip and save it anywhere as an image in windows 10.
Though Snipping Tool isn’t available on the list of apps accessed in the Start menu, you still can look for it on the Search bar. Let’s see how the snipping tool works.
Step 1) Make sure you’re on the screen of window, app, or software which you want to take screenshots of.
Step 2) Run the snipping tool from the start menu.
Step 3) Under “Mode”, select how you wish to take a screenshot.

Step 4) Proceed by clicking on “New.” Your current screen will freeze, and you can freely select part of the windows, by dragging the cursor. Once you have selected it, you will be returned to the Snipping tool window.
Step 5) Now you can either copy the screenshot to the clipboard, or you can save it to your desired directory.
With the snipping tools, you also have the option to delay when the screenshot is taken. You can delay it by 1 second, 2 seconds, 3 seconds, 4 seconds, and 5 seconds.
This may be useful in places where the part of which you want to snap, does not appear on the screen immediately. You can delay when the screen freezes and when to take the screenshot.
The snipping tool is being moved, and windows recommend its users to use snip sketch instead of it. A snip sketch is a similar tool, but with a bit more features than the snipping tool. Both of them are used to take screenshots.
How to take a screenshot by Snip & Sketch:
Snip Sketch is another software that comes preinstalled on the latest version of Windows 10. This software was not preinstalled on the older versions, but if you update windows, you’ll find the Snip Sketch software.
This tool gives you more flexibility when taking a screenshot. With the snip sketch, you have either option to annotate your screenshot before saving it. Let’s see how it works.
Step 1) Open Snip & Sketch from the Start Menu. You can also use the keyboard shortcut of the Windows key (the button with Windows logo) + Shift + S to open the Snip & Sketch tool.
Step 2) Click on “New” on the top left corner of the windows.
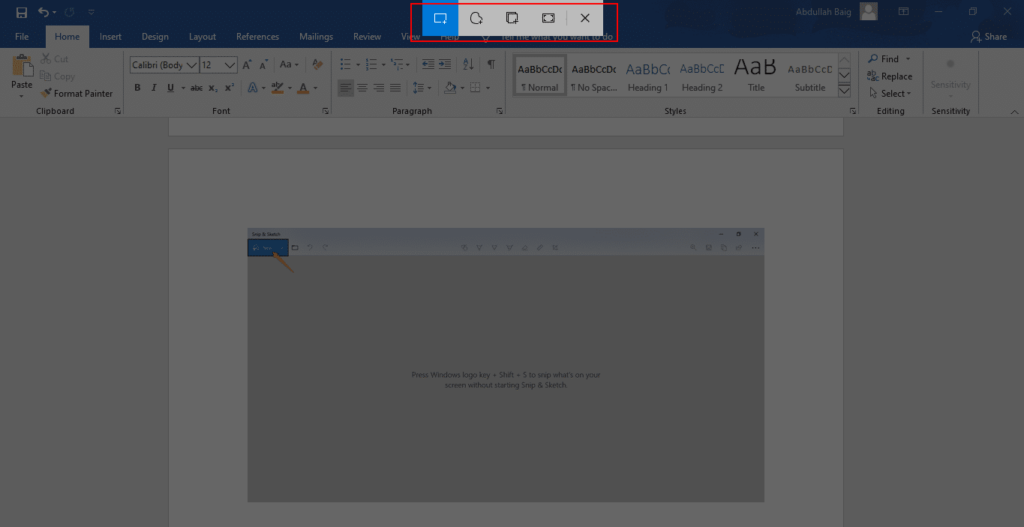
Step 3) The current screen will freeze, and you’ll find a small menu bar on the top. From the bar, you can choose your desired options if you want a rectangular snip, free form snip, window snip, or a full screen snip. Proceed by highlighting the area you wish to snip by dragging the cursor or capturing the entire screen.
Step 4) The captured snip will be copied to your clipboard and shown in a notification panel on the bottom right corner of your screen. You can paste it to drawing tools like Microsoft Paint with the keyboard shortcut Ctrl + V. You can also simply click the notification panel and the snip will get loaded to the snip sketch window.
Step 5) Here in the snip & sketch window you can annotate the snip with different options.
Step 6) Finally when you’re ready, you can either copy the snip to the clipboard, or you can save it as an image to your desired directory.
Taking screenshots with this tool is easier and offers more control—this isn’t an upgraded version of the snipping tool but rather an alternative to the snipping tool.
How to take screenshots with ScreenshotX
Another alternative that is worth considering is to use a third-party tool, such as ScreenshotX. ScreenshotX is a free Windows app that allows you to take beautiful screenshots and share them with ease.
ScreenshotX comes as a part of the jv16 PowerTools Windows maintenance utility suite, or you can download it as a freeware standalone tool from https://screenshotx.com/ – It also has a portable version available.
Taking free-size screenshots in ScreenshotX
Free-size screenshots enable you to have the flexibility to capture either a partial screenshot or a full-screen screenshot using a free-form snip. You can select and capture only the portion of the screen that you want, giving you more control over what you capture. Here’s how:
Step 1) Run ScreenshotX from the app or from jv16 PowerTools
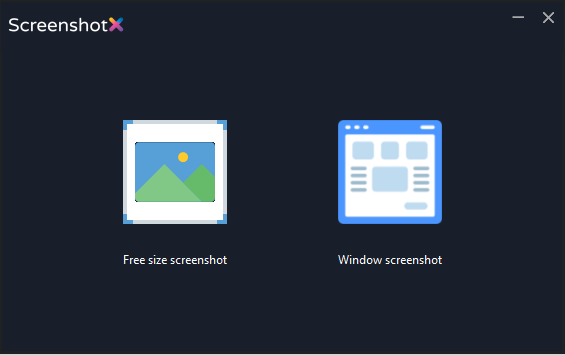
Step 2) In the new window, select the free-size screenshot

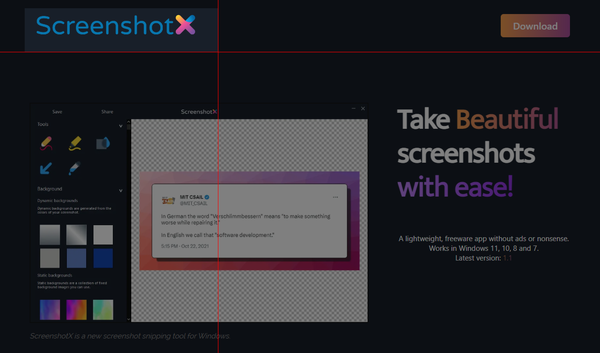
Step 3) Select the area you want to capture

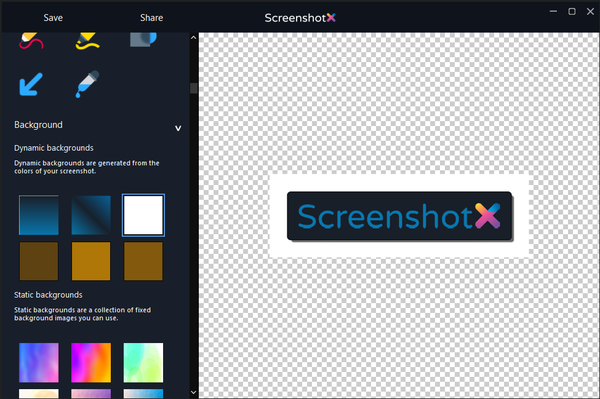
Step 4) Once you’re done, you’ll be redirected to ScreenshotX’s editing window. From there, you can customize the background, add some objects such as doodles, highlights, arrows, and even apply a blur effect

Step 5) You can either choose to save the screenshot locally to your computer using the “Save” option. Or, you can share the screenshot using a shareable URL using the “Share” option. Here’s an example of the shareable URL: https://screenshotx.com/i/111111. Please keep in mind that choosing the “Share” option will also give you an Administrative URL where you can see quick statistics of your screenshot views and remove the screenshot.
Taking window screenshots in ScreenshotX
Window screenshots give you a quick and easy way to capture screenshots of active windows that you choose. This is useful when you want to capture the contents of a specific window without capturing the entire screen. Here’s how:
Step 1) Choose the active window that you want to capture
Step 2) Run ScreenshotX from the app or from jv16 PowerTools
Step 3) In the new window, select Window screenshot

Step 4) Click on the active window you chose. This will automatically direct you to ScreenshotX’s editing window. From there, you can customize the background, add some objects such as doodles, highlights, arrows, and even apply a blur effect

Step 5) Once you’re done, you can either choose to save the screenshot locally to your computer using the “Save” option. Or, you can share the screenshot using a shareable URL using the “Share” option. Here’s an example of the shareable URL: https://screenshotx.com/i/111111. Please keep in mind that choosing the “Share” option will also give you an Administrative URL where you can see quick statistics of your screenshot views and remove the screenshot.
ScreenshotX allows you to take beautiful screenshots with ease
As you can see, there are various ways to take screenshots, with each method having different benefits. You can try out each of our listed procedures, so you can determine the most efficient workflow to take your screenshots.
If you want to take beautiful screenshots with ease though, ScreenshotX is a third-party app that you should give a try. Designed with user-friendliness in mind, the tool makes capturing and sharing screenshots a breeze with just a few clicks.
In addition to the standard features found in most screenshot apps, ScreenshotX also offers advanced functionalities that set it apart. These include a blur tool for removing sensitive information from screenshots, a color picker tool for easy identification of colors from screenshots, adjustable static or dynamic backgrounds for added customization, a single right-click option for instant saving or sharing of screenshots via a shareable URL, and quick statistics and administrative link for easy management of shared screenshots.
You can download ScreenshotX for free from https://screenshotx.com/ or access it from jv16 PowerTools by signing up for a 14-day free trial. If you opt for a free trial though, not only do you get access to ScreenshotX, but you can also leverage the other 17 powerful PC maintenance tools without any restriction!


