


The developer of RegCleaner, jv16 PowerTools, Uninstalr, WinFindr, Startup Timer, ScreenshotX, System Examiner and Windows Update Fixer.
If you want to test out Windows 11 without actually committing yourself to installing the whole system then you might want to install Windows 11 on a virtual machine, like VirtualBox. This guide will show you how.
This article also contains the typical errors that you might encounter while installing Windows 11 on a virtual machine, as well as how to troubleshoot and fix these errors.
Table of Contents
What is VirtualBox, and why do you want to use it?
VirtualBox or Oracle VM VirtualBox is a free and open-sourced virtual machine program developed by Oracle. With a virtual machine, you can run, test, and experiment with Windows 11 in a safe environment without affecting your main system.
Not only can you install Windows 11, but virtualization products like VirtualBox also allow you to use other operating systems like Linux and Mac without investing in hardware components. You can download and install VirtualBox for free from their website: https://www.virtualbox.org/
System requirements to install Windows 11 on VirtualBox
Do keep in mind that your system must comply with the following system requirements before you’re able to use VirtualBox:
- Proper updated x86 CPU
- Memory: minimum of 4 GB, though 8GB is more recommended
- Storage space: VirtualBox itself only requires 30 MB of hard disk space, but you’ll need enough storage to install the virtual machine. To install Windows 11, you need to have a minimum of 64 GB Virtual Disk
- A supported host operating system. Below are the supported Windows systems (64-bit):
- Windows 8.1
- Windows 10
- Windows 11 21H2
- Windows Server 2012
- Windows Server 2012 R2
- Windows Server 2016
- Windows Server 2019
- Windows Server 2022
Installing Windows 11 on VirtualBox
Once you’ve installed VirtualBox, here are the step by step to install Windows 11 on VirtualBox:
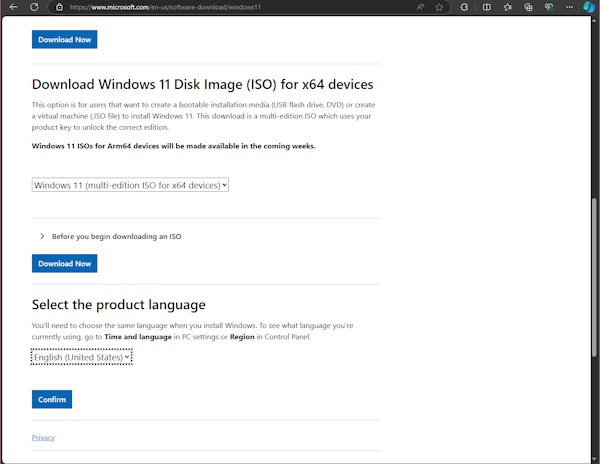
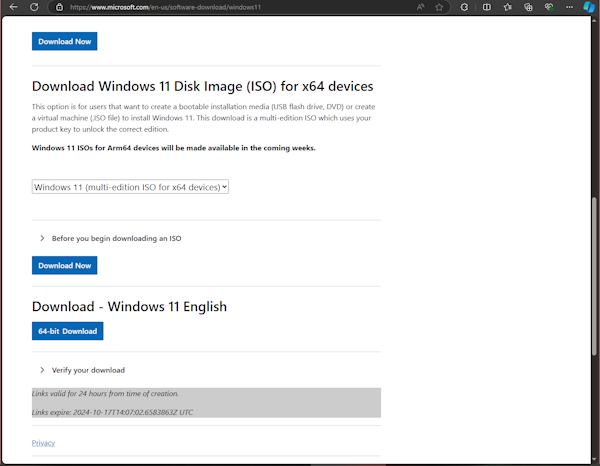
- Step 1: Download Media Creation Tool from https://www.microsoft.com/software-download/windows11. Under the “Download Windows 11 Disk Image (ISO) for x64 devices” select ‘Windows 11 (multi-edition ISO for x64 devices)’ from the ‘Select Download’ drop-down menu > click the “Download Now” button. After the request is validated, select the system language you want > click “Confirm”. After the request is validated, click the “64-bit Download” button.
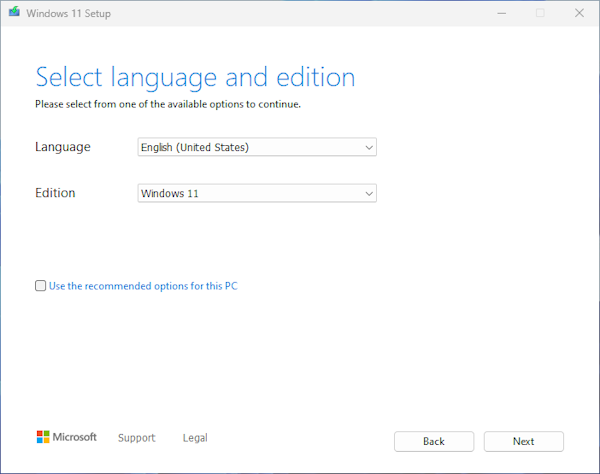
- Step 2: Run the Media Creation Tool select the Windows edition you wish to install and click “Next”.
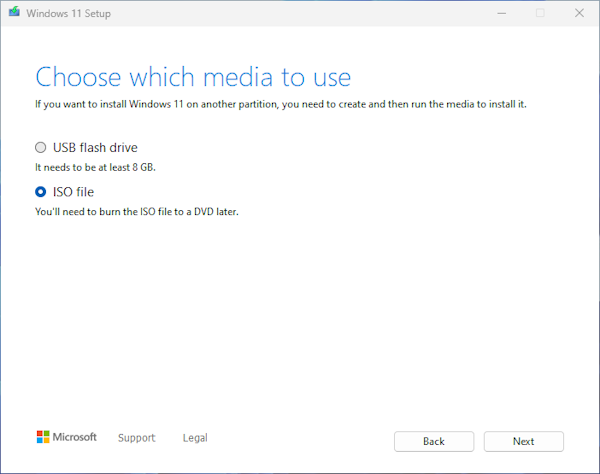
- Step 3: Select “ISO file”. Click Next and save the ISO image file to the desired location.
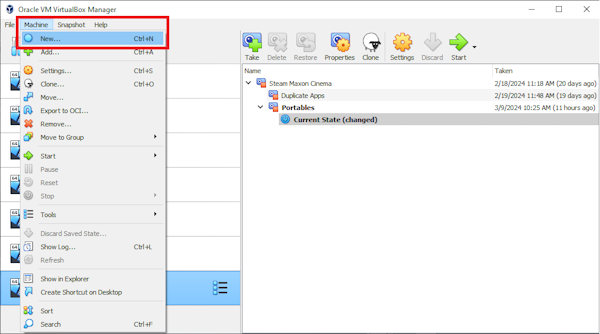
- Step 4: Open Oracle VM VirtualBox Manager. You can do this by clicking “Machine” > “New” from the menu.
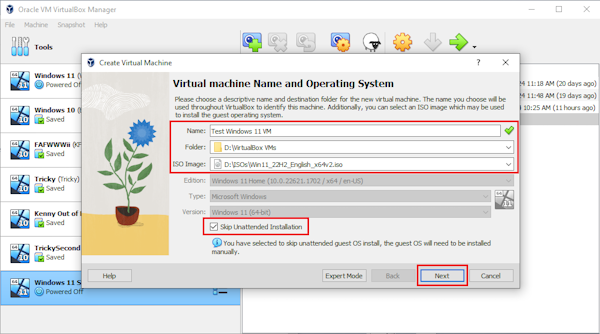
- Step 5: Name the virtual machine, select the installation folder, select the ISO file saved at Step 3, enable “Skip Unattended Installation”, and click the “Next” button.
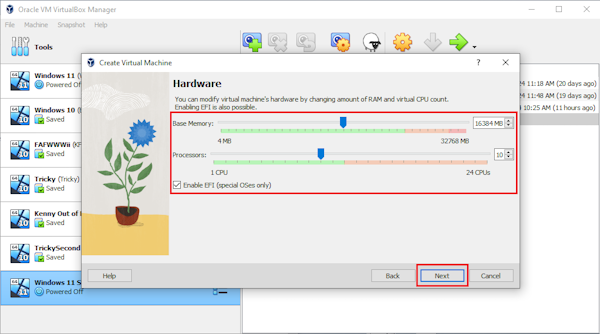
- Step 6: Choose the desired hardware (RAM and CPU) for the Virtual Machine and click “Next”. You need to have a minimum base memory of 4 GB, though 8GB is the recommended minimum. The more base memory you have, the better. The minimum CPU you have should at least be 2.
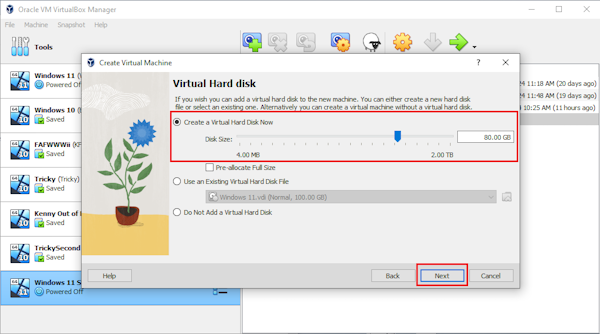
- Step 7: Create a virtual hard disk for the Virtual machine and click “Next”. You need to have a minimum of 64 GB Virtual Disk for this.
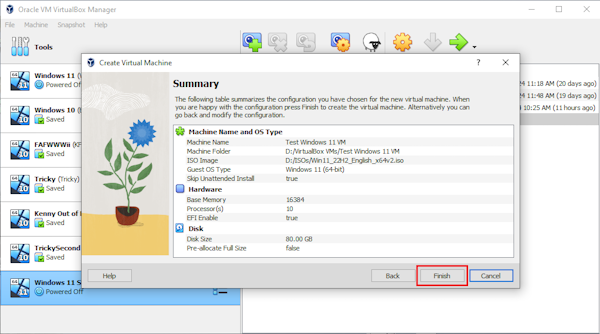
- Step 8: Double-check the Summary and click “Finish”.
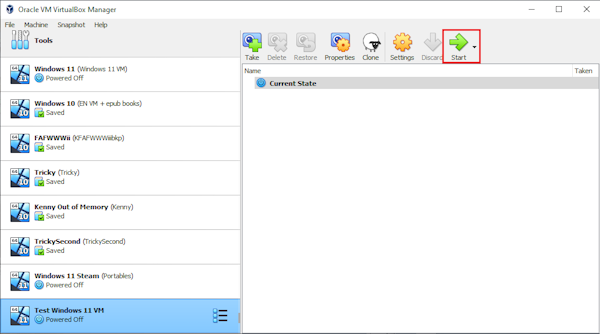
- Step 9: Start the Virtual Machine by clicking the “Start” button on the top right of the virtual machine window.
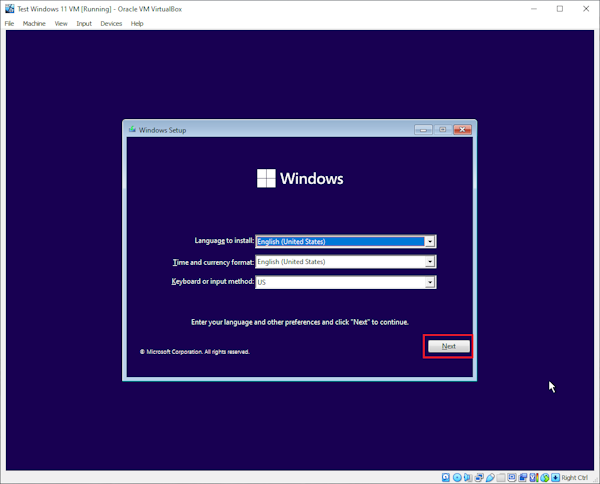
- Step 10: Follow the Windows Setup instructions to install Windows 11. At some point, you’ll be asked to press any key, and you need to make sure that 1) your cursor is right at the virtual machine window and 2) to immediately press any keyboard letter you want when that instruction appears. Choose the language, time, currency format, and keyboard or input method of choice then click “Next” and then the “Install Now” button.
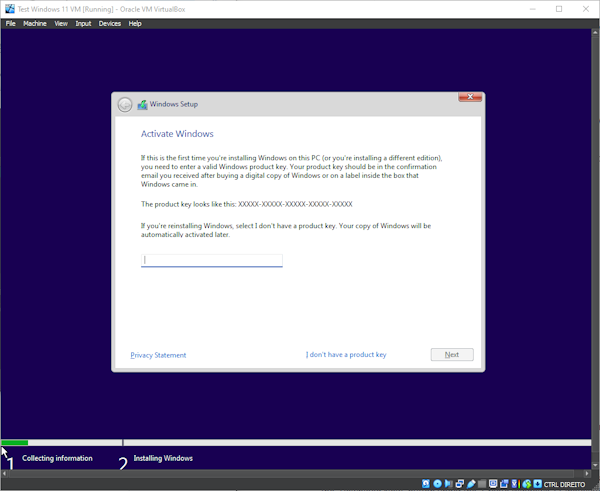
Afterward, you’ll also be asked to enter a product key. Enter the product key you have in the box, otherwise, click the “I don’t have a product key” option.
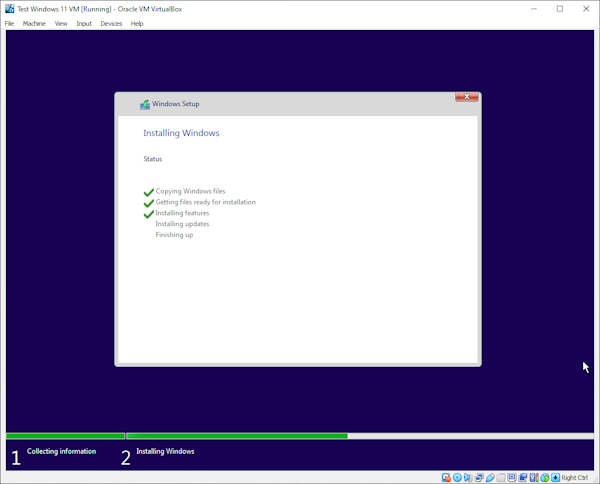
- Step 11: After Windows Setup runs, the Virtual Machine will reboot.
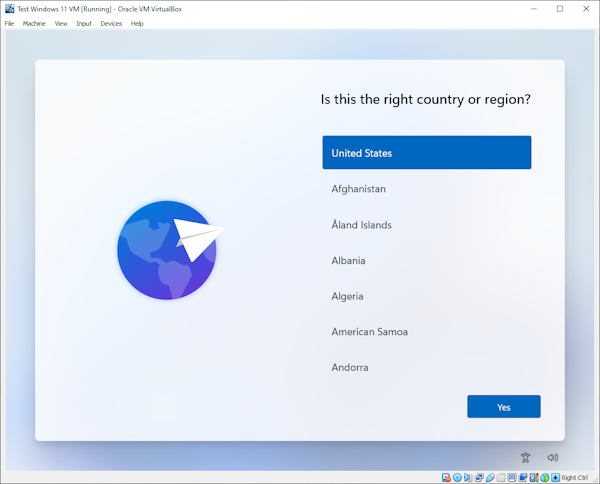
- Step 12: Select your region.
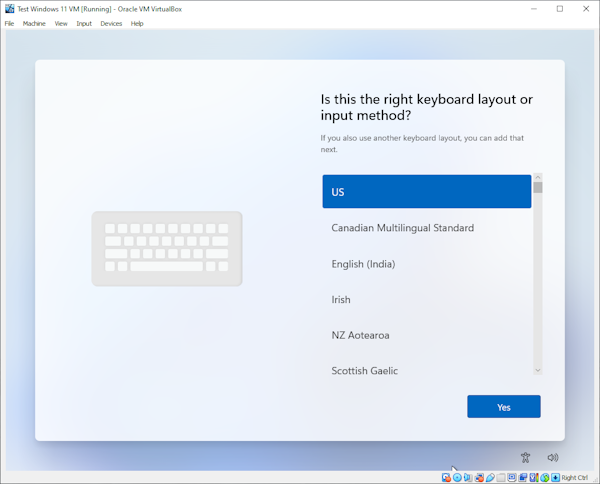
- Step 13: Select the keyboard layout.
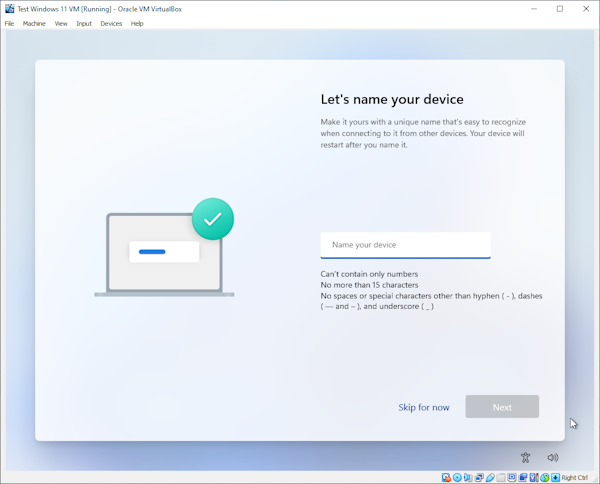
- Step 14: Name the device or skip it, if you prefer.
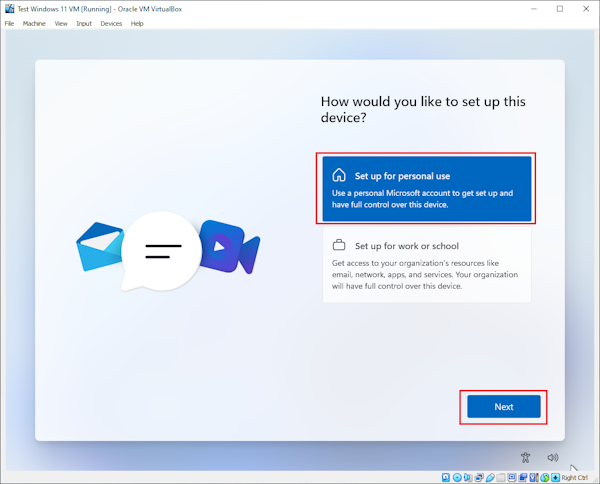
- Step 15: Select “Set up for personal use” and click “Next”.
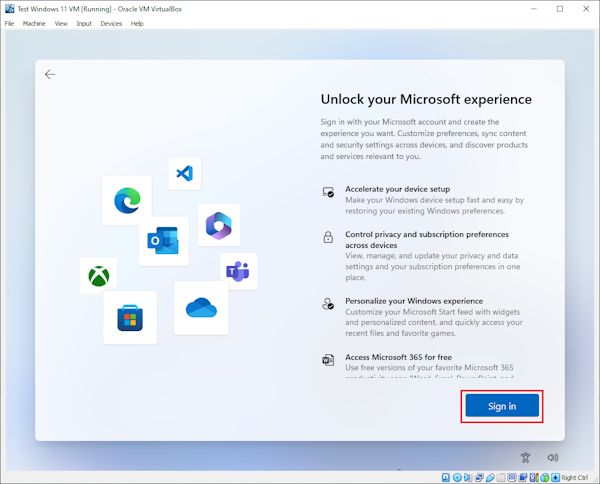
- Step 16: Sign in to your Microsoft Account. Note: There used to be an option to skip this option when installing Windows 11 Pro, but Microsoft has removed this option altogether. If you don’t want to sign in to a Microsoft account in this step, you can sign up to a Microsoft account with a temporary email using services like https://temp-mail.org/en/ instead.
Once you’re done, you need to solve the Captcha to prove that you’re not a robot. Simply follow the instructions and click “Submit”.

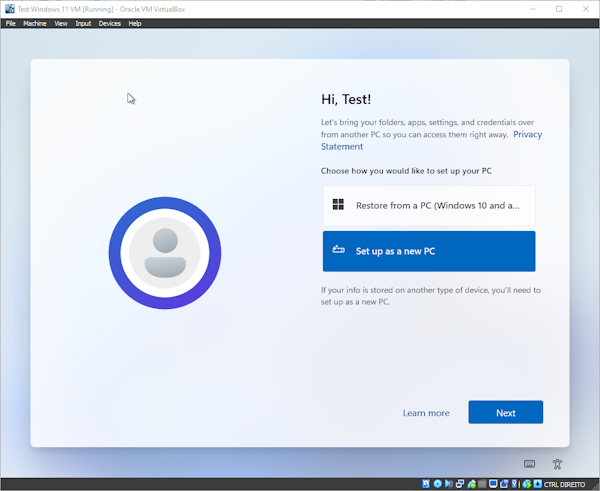
- Step 17: Click “Set up as new PC” and “Next”.
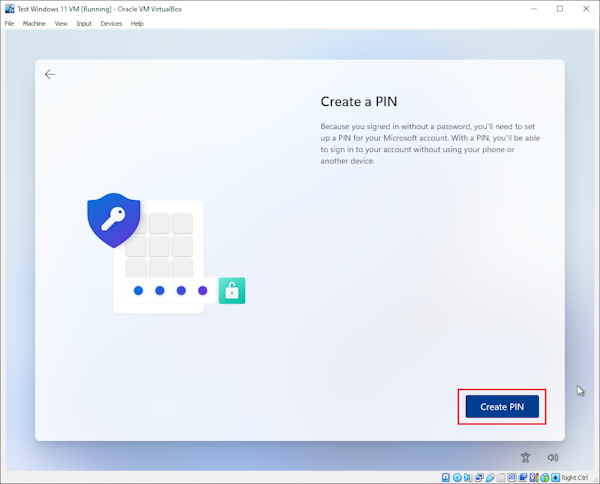
- Step 18: Create PIN.
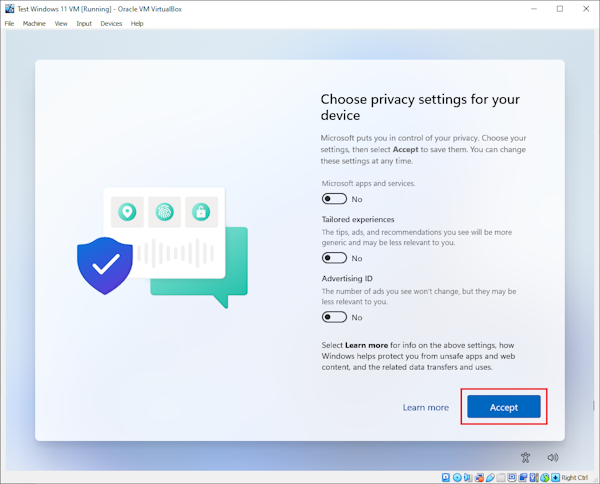
- Step 19: Choose your preferred privacy settings and click “Accept”.
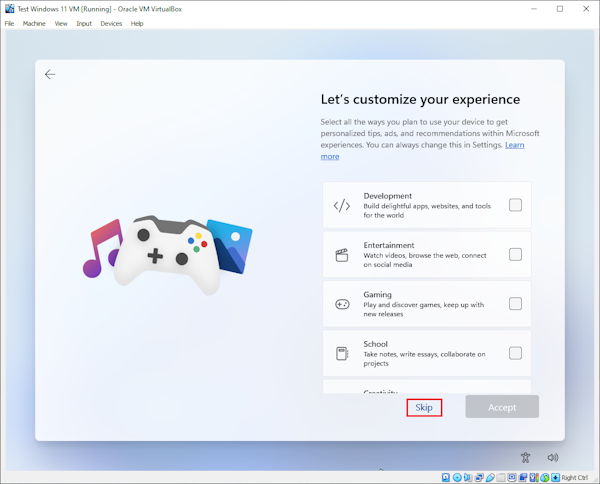
- Step 20: Skip customizing your experience by clicking the “Skip” option.
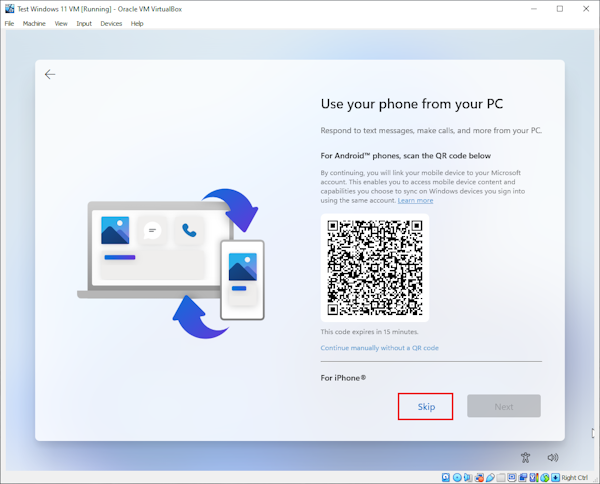
- Step 21: Choose only relevant settings and decline any Microsoft offers, if you prefer until you get to the “Installing features and updates” screen.
- Step 22: Now you can grab a coffee and wait for the updating process which could take around 30 minutes. At some point, you will be presented an option to stop updates and go to Desktop, but we recommend leaving it to update now, rather than updating later.
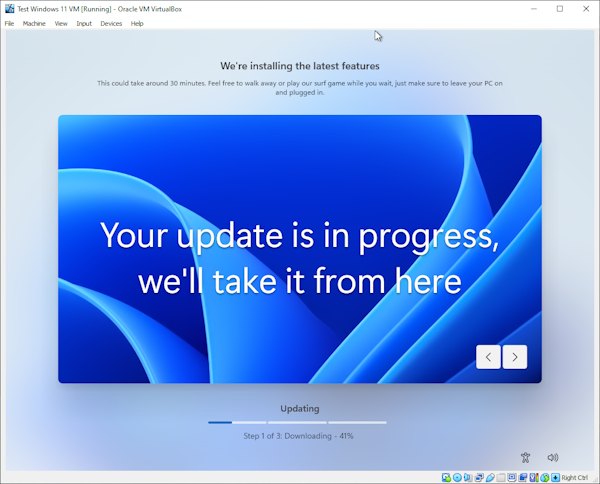
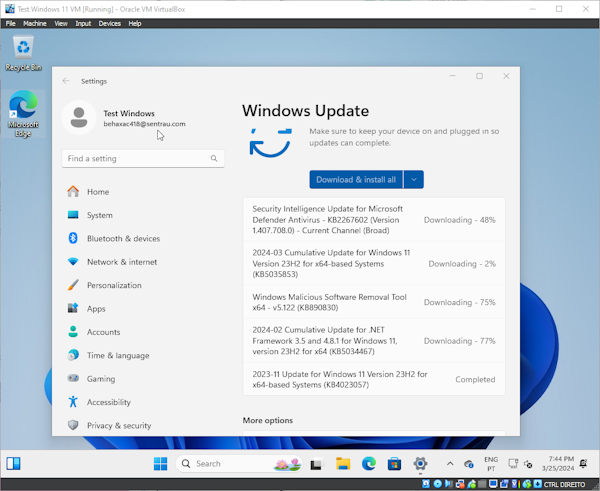
If you don’t see the “Installing features and updates” screen, we still recommend checking for and downloading the latest updates. You can do this by searching “Windows Updates” on the search bar > click “Windows Updates” from the results > on the Windows Update window, click the “Check for updates” button then wait until the update installation process finishes.
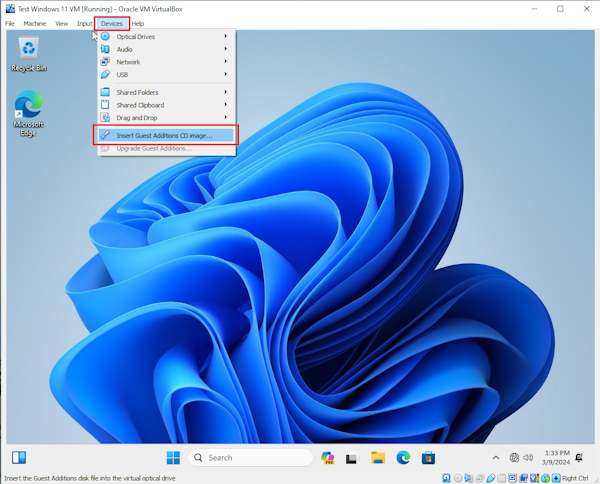
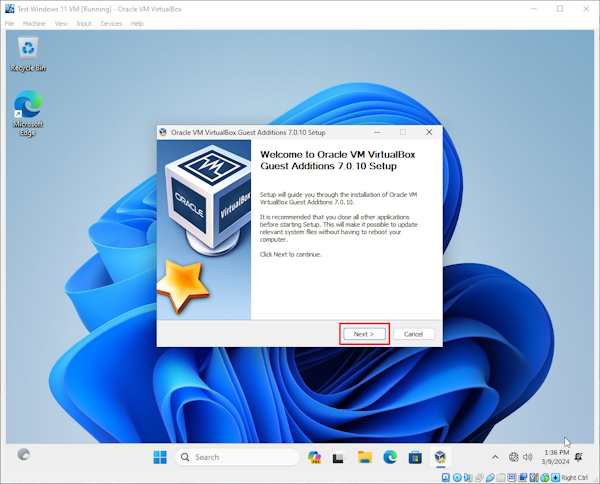
- Step 23: Once you’re on the Windows 11 main screen click “Devices” from the VirtualBox menu and choose “Insert Guest Additions CD Image”.
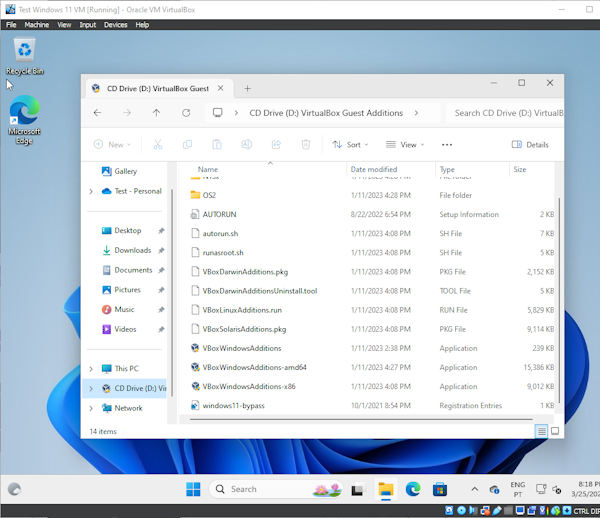
- Step 24: The above step will open File Explorer > run “VirtualBox Guest Additions” afterward.
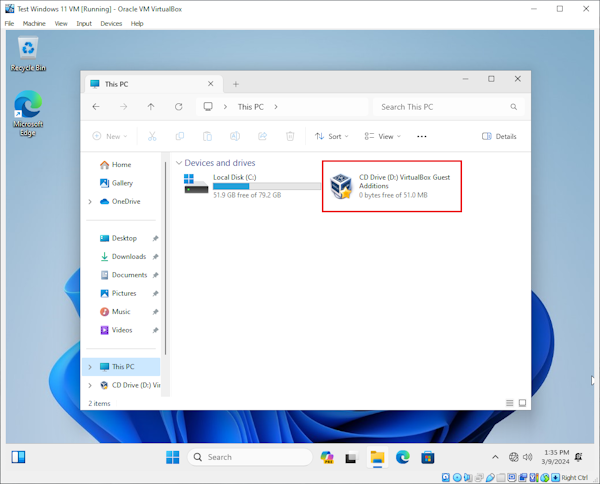
If you’re not automatically redirected to the relevant file’s location in steps 23 and 24, you can manually do this by going to Windows Explorer> go to CD Drive (D:) folder > run the “VBoxWindowsAddition” file.
- Step 25: Follow the setup steps on the screen to install Guest Additions. The Virtual Machine will reboot after this.
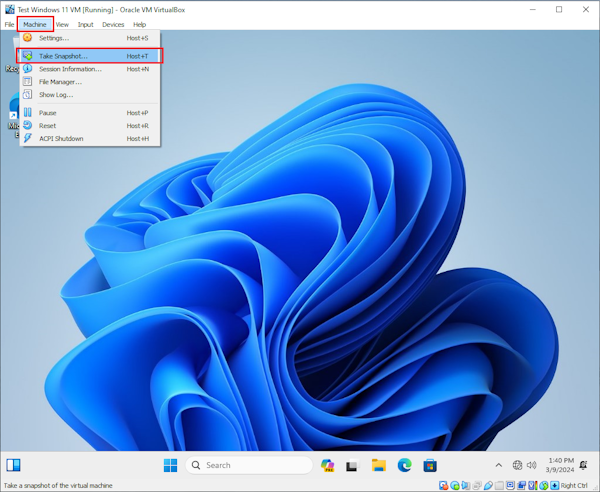
- Step 26: After Windows restarts, from the VirtualBox menu, click “Machine” and choose “Take Snapshot”.
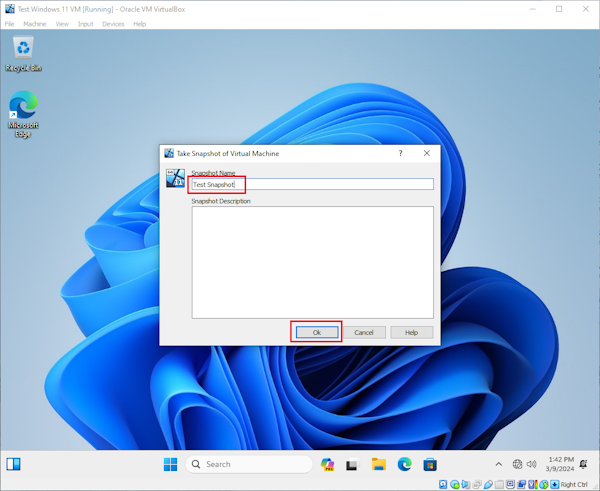
- Step 27: Name the Snapshot, click OK, and wait for the Snapshot to be saved.
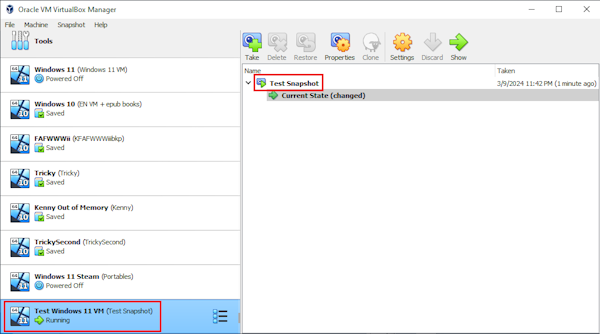
- Step 28: You now have a Virtual Machine running an up-to-date version of Windows 11, which you can use for testing purposes and restore after you are done!
Troubleshooting
In our test, we experienced an issue where we were unable to install Windows 11 with the “This PC can’t run Windows 11” error message.

This happens because Windows Setup automatically checks whether your virtual machine meets all of the minimum system requirements. After making sure that you have followed all of the recommended settings above, you can try the following to fix this issue:
- Choose the virtual machine > click “Settings”
- In the virtual machine’s settings, click the “System” menu
- Change the TPM to “v2.0” and click “OK”
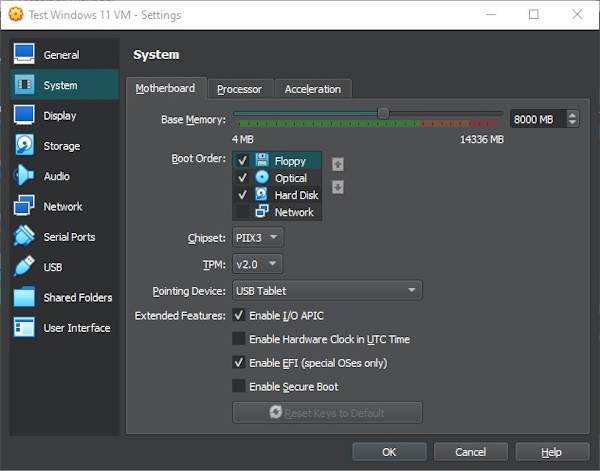
- Retry the installation process
Conclusion
Installing Windows 11 in a virtual machine like VirtualBox is a great option when you want to test or experiment with the operating system without performing a full installation. Though this seems to be complicated, with the step-by-step guide above you should be able to do this.
If you like this guide, please consider sharing this on your social media and follow our blog for more Windows tips!