


The developer of RegCleaner, jv16 PowerTools, Uninstalr, WinFindr, Startup Timer, ScreenshotX, System Examiner and Windows Update Fixer.
Welcome to our step by step instructions on System Restore in Windows 10.
For other OS specific step by step instructions please see:
For a general overview of Windows System Restore Feature:
How To Use System Restore In Windows
Windows 10
Windows 10 is the latest operating system introduced by Microsoft Windows. It has some new recovery options and some are similar to the older versions. Windows 10 allows the user to revert back to the last working state same as the previous version. It does this by help of an in built tool “system restore”.
System Restore
Windows in-built tool which helps to recover from problems that might stop your computer from working properly. System restore works with help of restore points which are a snapshot of specific files. These files are imperative in nature and will be saved when significant events take place in your system. Personal files like photos videos emails will not be restored during System Restore.
The user can create restore points or the system will create them by default every week. The system can also create restore points automatically when a major change like Windows update, new device driver or app installation takes place. On Windows 10 storage space requirement for restore points can be as less as 1% or it can even be 100% of the hard drive.
How to Enable System Restore in Windows 10- Step by Step Guide
- Step 1: Boot your Windows 10. In order to do this, restart your computer and press F8. Select ‘repair your computer’ from the list and then navigate through the choices.
If you’re unable to boot you can take help of ‘download restore disk’.
- Step 2: Check whether System Restore is enabled or disabled. Once rebooted, check whether System Restore is enabled or disabled. For many users, System Restore protection is turned on by default for your main system drive (C:) and not other drives on your computer. For other users, System Restore is not enabled by default for any of the drives.
For most users system restore is enabled by default and can it also be disabled by default for any devices or its main drive(C :). The system restore is disabled by default on Windows 10.
- Step 3: Then once you’ve checked and you want to enable, Click ‘Start’ button.
- Step 4: In the search bar write restore
- Step 5: Select the first option “create restore point” from the list of options available.

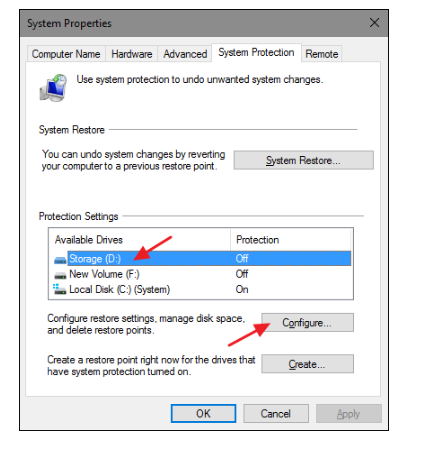
- Step 6: System Properties box opens. From the different tab options available select the “System Protection Tab”
- Step 7: Under the ‘Protection Settings’ heading you’ll see the Available devices and their Protection Status either on or off. To turn on protection for the available devices, Click “Configure”.
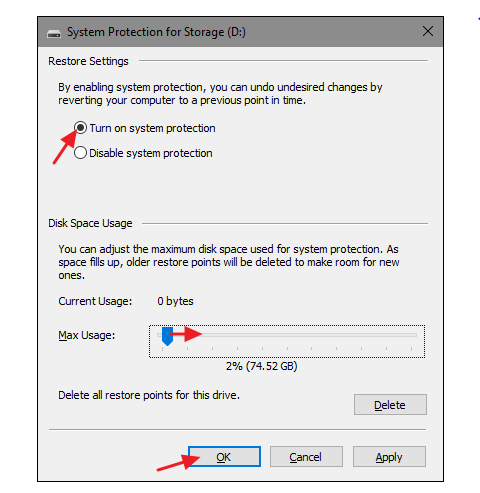
- Step 8: “System Protection for Storage” dialog box opens. Select the first option “Turn on system protection” under the Restore settings heading.
- Step 9: Set Max Usage according to your need – this determines the percentage of hard drive space that will be used for restore point-5% to 10% is recommended for Windows 10. Click OK.
- Step 10: Click OK once more to exit the “System Properties” dialog box
How to Restore a System Restore Point in Windows 10-Step by Step Guide
If the user wants to create restore points manually before making any major system change they can by following the below explained procedure.
Create a Restore Point:
- Step 1: Click Start button
- Step 2: Type Restore in the search bar
- Step 3: Select the first option “create restore point” from the list of options available.
- Step 4: “System Protection for Storage” dialog box opens. Select the first option “Turn on system protection” under the Restore settings heading. Click on Create button.

- Step 5: In the box that appears type details of your restore point . After detail completion click “Create”.

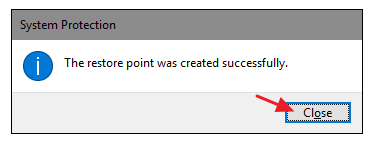
- Step 6: Restore point creation will take approximately 30 seconds. A box appears when it is done, click ‘close’.
Perform System Restore:
- Step 1: Click Start button
- Step 2: In the search bar type restore. Select the first option “create restore point” from the list of options available
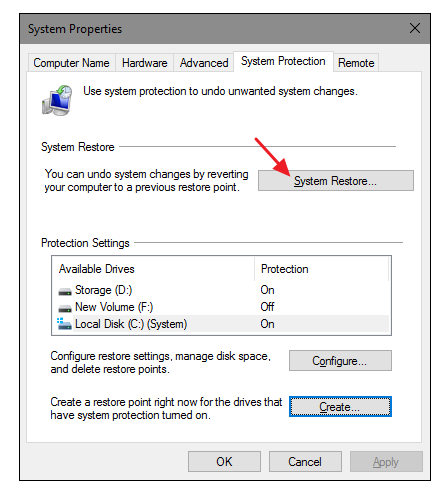
- Step 3: System Properties box opens. From the different tab options available select the “System Protection Tab”
- Step 4: Click ‘System Restore’ which happens to be under the system restore heading.
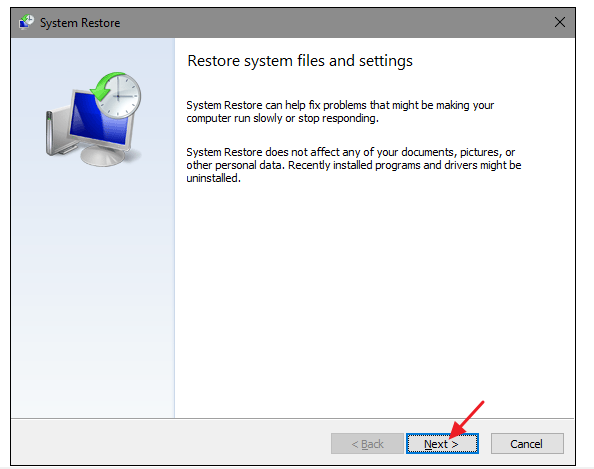
- Step 5: A dialog box of System Restore Wizard will open which gives details about the process- Restore Systems Files and Settings
- Step 6: Click Next
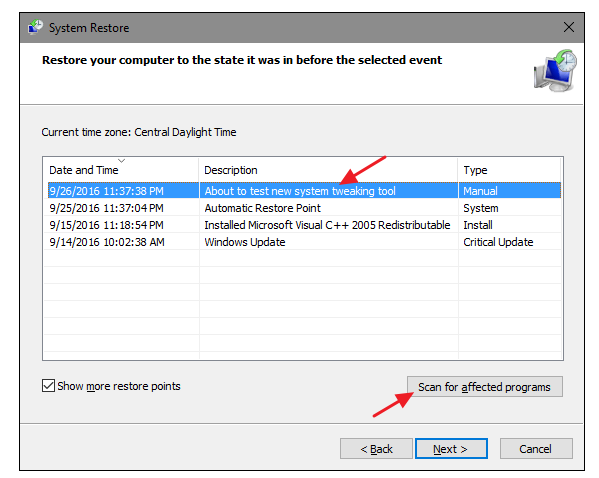
- Step 7: After you have clicked next, another dialog box will open which shows the restore points, which were created automatically. Select “show more restore points”, this will show you resort points created automatically before an app was installed or restore points that were created manually.
- Step 8: Select the restore point of your choice. Click “Scan for affected programs”- it is important you go through list of programs that have been affected.

- Step 9: A dialog box having two list will appear, the first one shows programs and drivers that will be deleted the second one shows programs and driver that might get restored. Click ‘close’.

- Step 10: Select restore points from the list provided
- Step 11: Click ‘next’.
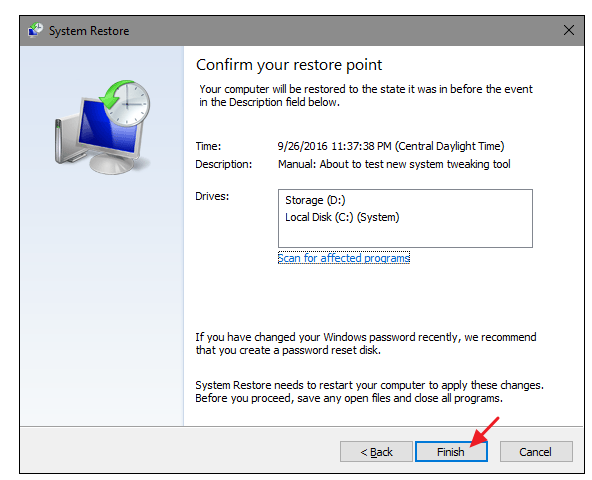
- Step 12: For confirmation if the selected restore point a box will open. Click ‘finish’.
- Step 13: A dialog box will inform you that once the process has started, it cannot be disturbed. Click yes to start.

The process will commence after the Windows restart the PC. System Restore may take about 15 minutes or more-but after the process it will start from the last working state.
NOTE: A new restore point is made by System Restore before it starts the process. This means you can undo your changes the same way as explained away by just selecting the new restore point.
As mentioned above, system restore will restore system files, drivers, registry settings, and the installed software. Some programs like antivirus tool may not work as well they should, or at all, after the restoration. As you can see, Windows will list all the affected programs. Take a look at the list so you know which programs will be affected during the process.
Additionally, any Windows Updates installed after the creation of the restore point will be uninstalled. Your personal files and other data will not be affected, so system restore points cannot be considered as a data backup.
System restore does not remove or clean virus or malware because, unlike regular software, they are deeply rooted in and affect your operating system. Since restore points are saved on each volume, the system restore will not work if the volume has been corrupted. Therefore, you should have other ways to protect your windows software besides creating restore points in your Windows.