


The developer of RegCleaner, jv16 PowerTools, Uninstalr, WinFindr, Startup Timer, ScreenshotX, System Examiner and Windows Update Fixer.
We all know the new computer feeling: Windows is fast and responsive. But after a while, it seems to slow down.
That is why we wanted to write this: The ultimate guide on how to make your Windows 10 faster.
Of course, when talking about how to speed up your computer, the obvious recommendation would be to buy faster hardware, such as upgrading your CPU, adding more RAM or getting a faster SSD. But, this is not what we’re going to discuss here.
Let’s start by defining what this article is exactly about:
- We are not discussing hardware updates – this article is purely about software.
- Furthermore, there are many software products that claim they can make your computer faster. But we are not touching any of those in this article either – we will be only using the tools that come with Windows.
- Thirdly, we need to define exactly what “making Windows 10 faster” means. While we could run multiple different types of benchmarks to establish the speed of a computer, in this article we focus on one very easily measured number: Windows startup time.
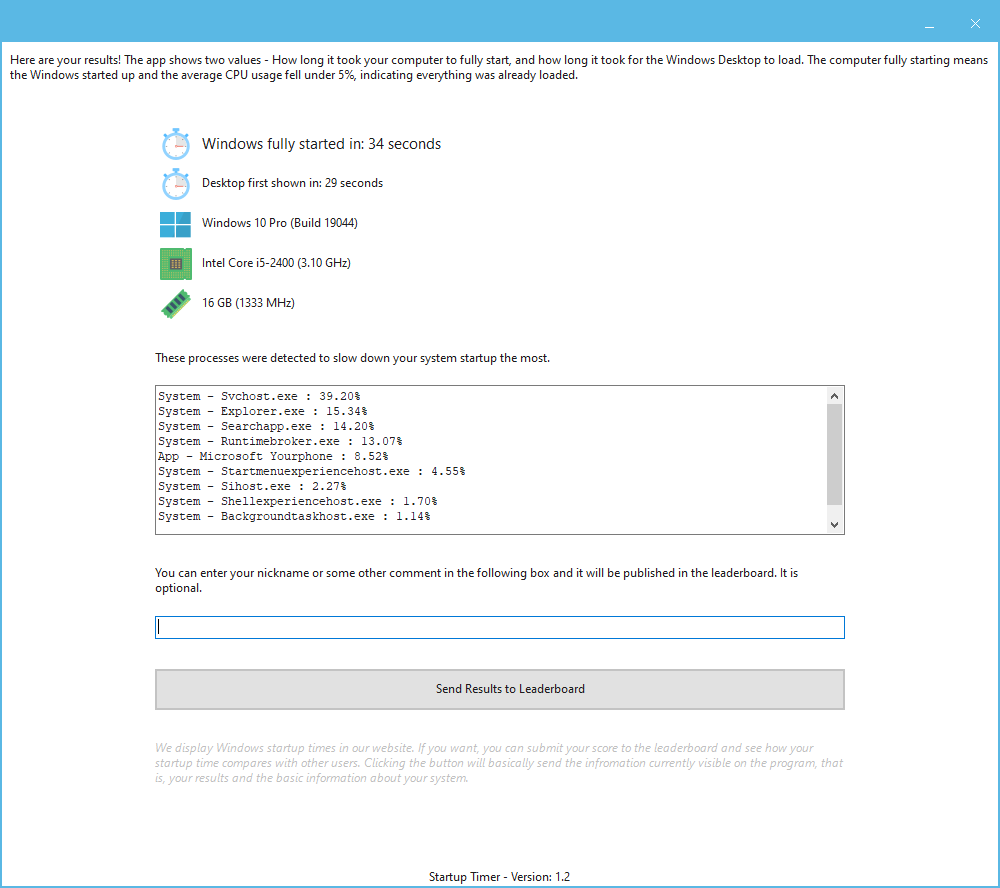
To measure how fast the computer starts up, we are going to use a freeware app called Startup Timer. It measures how long it takes for the system to fully start up, that is, when Windows has booted up, the Windows Desktop has fully loaded and the CPU usage has stabilized to under 5%.
This distinction is very important, because Windows uses delayed loading to show the Windows Desktop as fast as possible, even though the system isn’t fully started up yet. That’s why using an app like Startup Timer is important. Not only does it remove the human element from measuring the Windows startup time, but it also measures when the system is fully started up, instead of only measuring how long it takes for the Desktop to show up.
Table of Contents
Tip 1: Turn off Windows features you don’t need
Tip 2: Uninstall apps you don’t need
Tip 3: Disable visual effects and animations
Tip 4: Disable search indexing
Tip 5: Delete unneeded temporary files and cache files
Tip 6: Disable automatically starting programs
Tip 7: Disable unused Windows system services
Tip 8: Disable Windows 10 weather and news feeds, Windows search highlights and Windows search web results
Summary – Which tips work better to make Windows start faster
Conclusion
The basics of making Windows 10 faster
There are many factors that affect the performance of your Windows PC and the key takeaway is that there are no silver bullets to magically boost the speed of your computer.
Most of the tips and tricks shared here relate to disabling things from your system. And that is indeed the key of optimizing Windows: disable and remove all Windows features and apps that you don’t need, because they are probably making your computer slower.
This article contains the best tips on how to make your computer faster and also benchmark tests to see how much effect all these tips actually have.
We know there are a lot of these tutorials and click-bait articles on the best ways of making Windows faster. However, we are doing something that as far as we know, no one else has done: We are actually testing each of these tips to see how much of an effect they have on making Windows 10 start faster.
We include two labels with each tip, ‘Expertise required’ and ‘Potential effect on performance’. The expertise required is our estimation of how difficult it is to apply the tip, while the potential effect on performance is based on the actual benchmarks we did by running Startup Timer before and after applying the tip.
The last thing before we start with the tips on how to make your computer start faster is the baseline. To know how big an effect these tips have, we first used Startup Timer to measure how long it took the system to startup.
With this test setup of Windows 10 with all updates and some common apps (Firefox, PhotoScape, Audacity, PowerISO, Winzip, IrfanView and Steam) installed and all Windows 10 settings as they were after installation, the baseline system startup time was 39 seconds.
Tips to Improve Windows 10 System Performance
The first tip should go without saying, but let’s get it out of the way regardless: Always keep your Windows updated. This ensures you are running the latest version of Windows with all the possible performance and more importantly, security related updates.
Tip 1: Turn off Windows features you don’t need
Expertise required: Medium high
Potential effect on performance: Low
Type “Turn Windows Features off” to the Windows Search bar and it will open a handy little tool that allows you to pick and choose which Windows features you need.
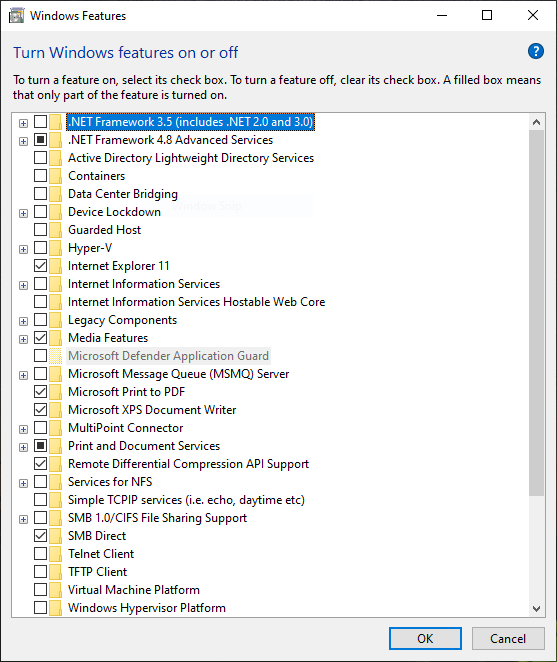
You will need to know what you are doing here not to disable anything that you actually need, but here are some tips to get you started:
- If you are using a browser like Google Chrome or Mozilla Firefox, you can turn off Internet Explorer 11.
- If you are using a third party app (such as VLC Media Player) to view videos, you can most likely turn off the Windows Media Features.
- Unless you know you will be using Microsoft Print to PDF feature, you can probably disable that, as well as Microsoft XPS Document Writer.
- If you don’t have a printer, you can turn off the Print and Document Services.
- Most likely, you can disable Remote Differential Compression API Support, which is a feature mostly relating to Windows servers.
- Windows PowerShell 2.0 refers to an old version of the PowerShell and can typically be disabled, unless you know you also need to have the support for it. Therefore, it’s probably good to disable it.
- Windows Process Activation Service is mostly related to IIS and web development for Windows Servers. If you don’t know what that means, you can probably turn it off.
- If you don’t work with shared files, especially in a local network or corporate environment, you can probably turn off the Work Folders Client.
As you can see with the above tips, they are all basically “turn things off that you don’t use”.
We disabled all the mentioned features in our test system, applied the settings with a system reboot and then used the Startup Timer to see what kind of an effect disabling Windows features had on the startup time.
After disabling these features, Windows started up in 38 seconds, which is one second faster than before.
Tip 2: Uninstall apps you don’t need
Expertise required: Low
Potential effect on performance: High
While it should go without saying, you should only install apps to your computer that you really need.
It’s easy to think that with modern computers and their almost unlimited storage, one could simply just install anything and that has no effect on the system’s performance.
This couldn’t be further away from the truth – the more apps you install, the slower your computer will become.
To demonstrate this, we uninstalled every single app from the test computer using the default Windows method of uninstalling apps, that is, the Windows Apps & Features.
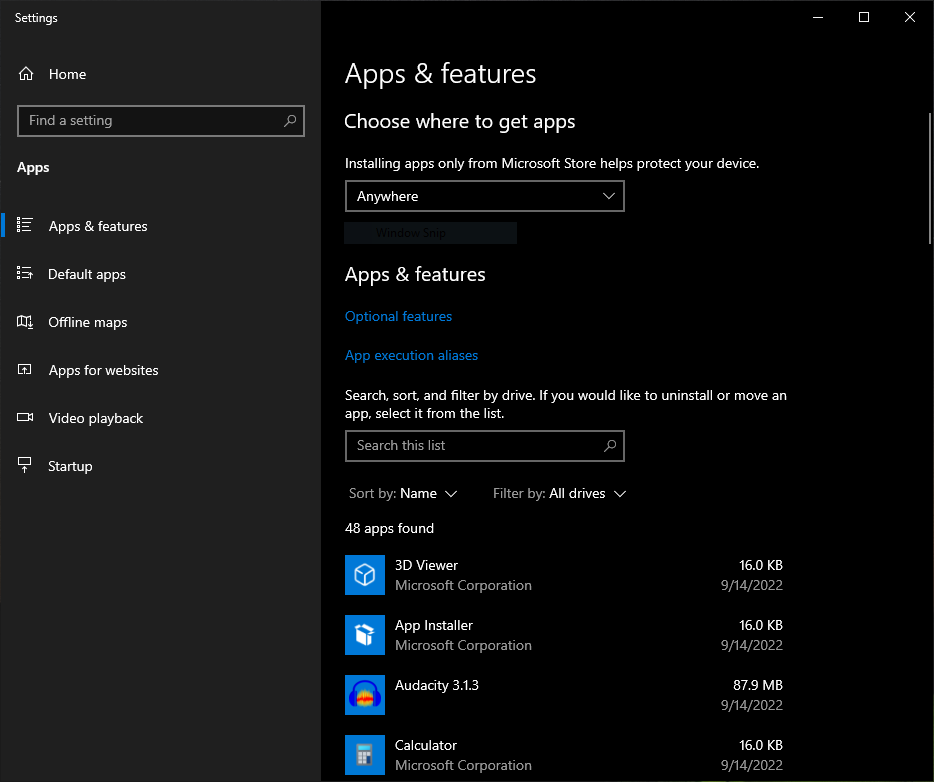
With all the apps installed, Windows took 39 seconds to start. With all apps uninstalled, the system boot time dropped to 29 seconds!
Of course, we are not recommending you to uninstall every app you have. We simply uninstalled these apps in this test to demonstrate the major effect that will have. You should uninstall any apps from your system you are not using.
Tip 3: Disable visual effects and animations
Expertise required: None
Potential effect on performance: Low
We all love some fireworks sometimes, but all the visual effects and animations you have enabled in Windows come with a price: they will make your system slower.
How much slower depends on many factors, but especially on what kind of video card you have.
To disable visual effects and animations on Windows 10, you can write “Show Animations” to the Windows Search bar.
You can consider disabling:
- Show animations in Windows
- Show transparency in Windows
- Automatically hide scroll bars in Windows
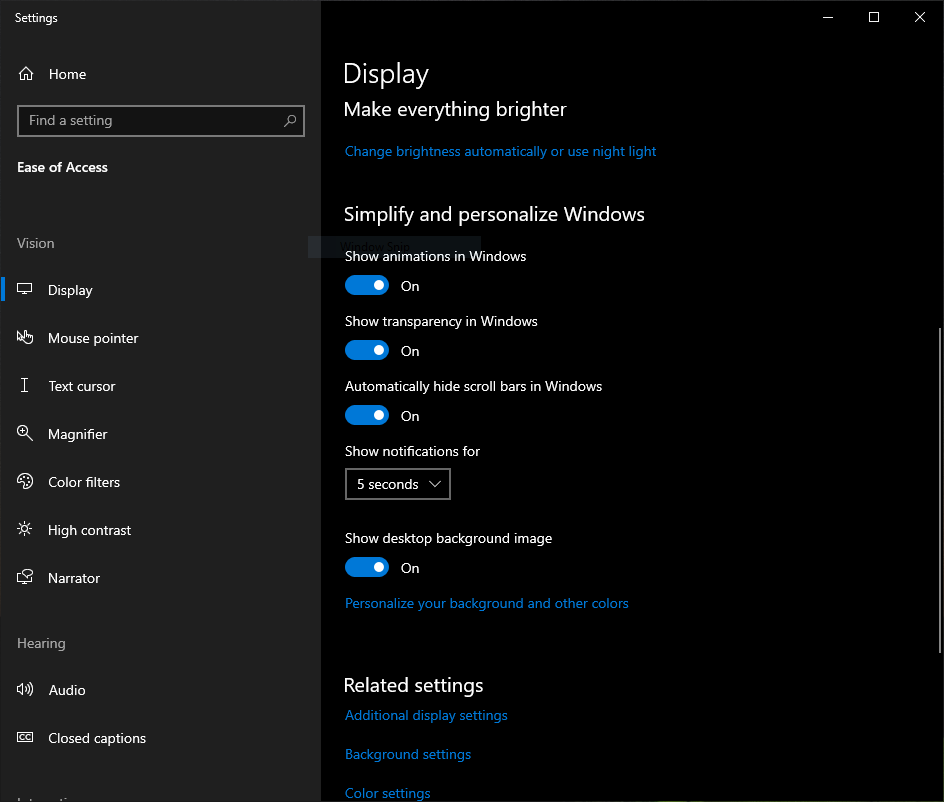
We disabled all visual effects and animations in the test Windows 10 system and the system startup time dropped from 39 seconds to 38 seconds.
Tip 4: Disable search indexing
Expertise required: Low
Potential effect on performance: Medium high
Windows search indexing is a feature that constantly analyzes the contents of your computer in order to make the file searching faster. Disabling this can make searching files using the normal Windows file search very slow.
But, if you don’t use the Windows file search, or you use any better file searching tool such as Everything by Void Tools, you can disable search indexing.
To disable Windows search indexing, first open the File Explorer or My Computer, and Right Click your each hard drive and uncheck “Allow files on this drive to have contents indexed in addition to file properties”.
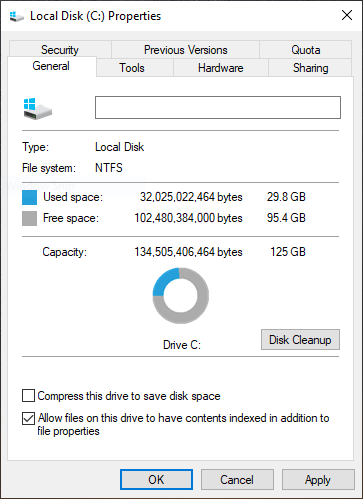
Notice that this will update settings for each file in the disk and this might take some time to run.
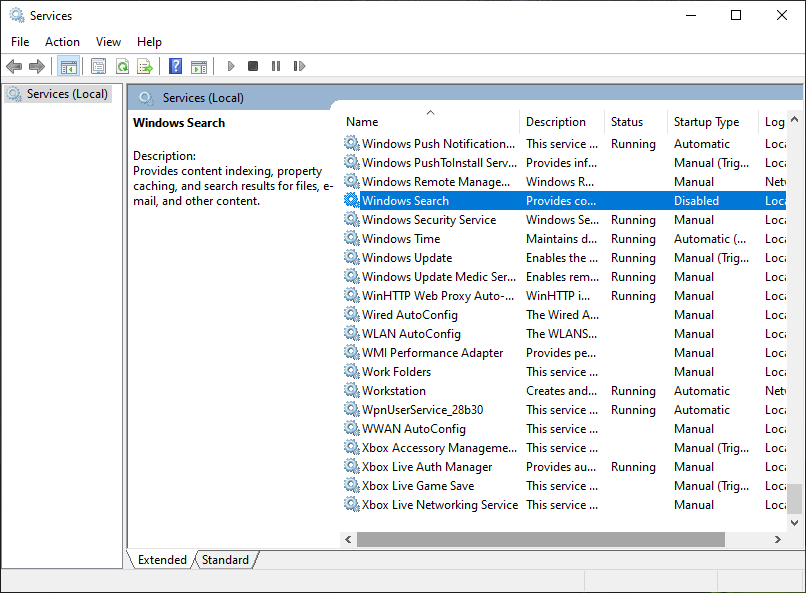
After this, type Services into the Windows Search Bar, locate the Windows Searching service. Right Click it, choose Properties and change its Startup type to Disabled.
We disabled Windows search indexing in the test Windows 10 system and the system startup time dropped from 39 seconds to 36 seconds.
Tip 5: Delete unneeded temporary files and cache files
Expertise required: Medium high
Potential effect on performance: Low
As we showed in our previous testing, having too many unneeded files can slow down your computer. See the benchmark study here: https://jv16powertools.com/blog/benchmark-does-junk-data-slow-down-windows-10/
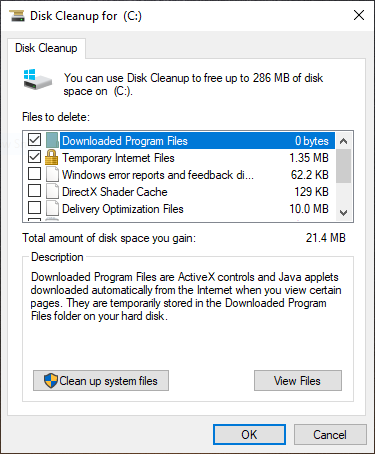
Windows 10 comes with a simple Disk Cleanup tool. To start it, type Disk Cleanup to the Windows Search Bar.
There are some important points to make when it comes to cleaning your computer in order to make it faster.
- First of all, a lot of cleaning of files in this context means that you are removing cache and prefetch files. Cache and prefetch files are used to make your system faster. Therefore, simply deleting all cache and prefetch files can actually make your system slower until the cache files are again regenerated, which may take a moment.
- Secondly, as we are talking about removing data from your system, there is always a risk that something goes horribly wrong. You should never remove anything from your system unless you know what you are doing. And even if you know what you are doing, you should have the Windows System Restore enabled and create a System Restore Point before doing anything to ensure you can restore your system in the case something does go wrong.
That being said, we used the Disk Cleanup tool to perform all the cleaning modules the app has.
After this, we ran the following Windows Command Prompt command in the Administrator Command Prompt:
del /S /Q c:\windows\temp* && del /S /Q c:\windows\prefetch* && del /S /Q C:\users\%username%\appdata\local\temp*Then, we restarted the computer two times to let it regenerate any cache and prefetch files.
Finally, we tested the startup speed again. Before cleaning the temporary files, the system startup took 39 seconds. After, it took the same 39 seconds.
Please notice that your results with this method will vary greatly depending on how many temporary files you have. If you have a fairly old system with a lot of data, cleaning your temporary files might provide quite an improvement in your system speed. This test system had barely any temporary files or cache files in it.
Tip 6: Disable automatically starting programs
Expertise required: Low
Potential effect on performance: Medium high
Earlier the importance of uninstalling unused apps was discussed. With the apps that you are still using, you should ensure they are not started automatically.
There are very few exceptions on what kinds of apps should be automatically started with Windows. Only things like always running software such as device drivers or Desktop widgets could be justified to automatically start, everything else should be started by you, when you need them.
To disable automatically starting programs, simply open the Windows Task Manager – For example, right click the time and date section in the Windows task bar and choose Task Manager from the right click menu. Be sure to have the More details view open. Open the Startup tab.

The Startup tab lists all of the automatically starting software and it also includes an estimate from Windows which of these apps are impacting your system startup the most. However, these impact estimates are just estimates. To maximize the performance of your computer, you should not have anything automatically starting, except software like device drivers and Desktop widgets.
Do notice that disabling automatically starting programs from the Task Manager’s Startup tab does not remove the programs, nor disable the programs from running, it only prevents the apps from automatically starting with Windows. You can still manually run them.
We disabled all the automatically starting programs to test how much of an effect this will have on the system startup time. Before, it took Windows 39 seconds to start. After disabling the automatically starting programs, the Windows startup took only 34 seconds!
Tip 7: Disable unused Windows system services
Expertise required: High
Potential effect on performance: Medium
Windows services are built in modular parts of Windows which are often always running in the background, waiting to be used. While the system services in Windows 10 and Windows 11 are very well optimized, it can be possible to get some performance gains by disabling unused Windows services.
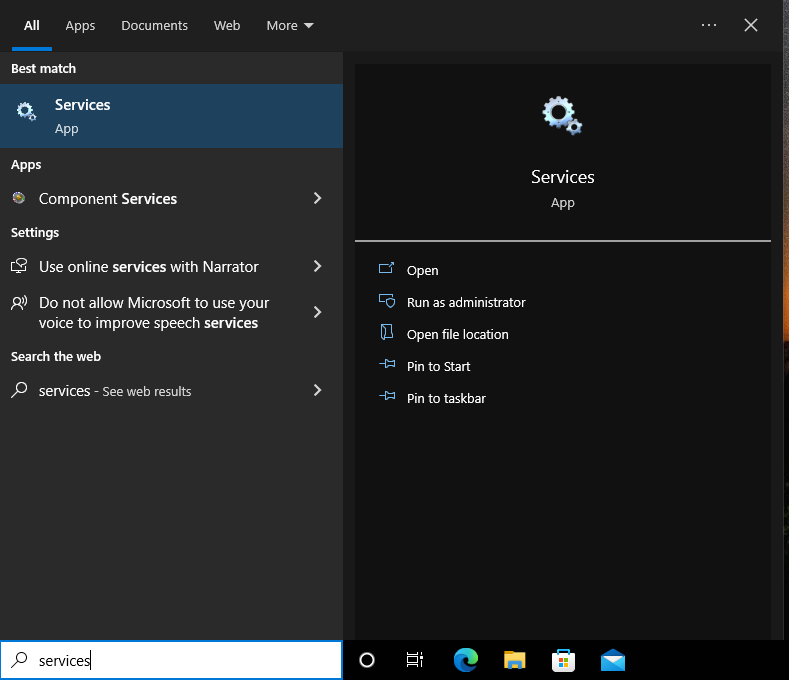
To edit Windows Services, type Services into the Windows Search Bar to open the tool.
When talking about disabling unused Windows services, it’s good to point out that you don’t actually need to disable anything to get the performance gains – it’s actually safer to simply change the Startup Type of unused Windows services from Automatic to “Automatic (Delayed Start)”. If you are really sure you don’t need a specific Windows service, you could change its Startup Type to Manual.
It’s impossible to give out any definitive list of which Windows system services you can disable, because that depends on the configuration of your computer, what you are using the computer for and many other factors.
But, generally speaking, the following Windows 10 system services are often said to be safe to disable:
- AVTCP service
- Background Intelligent Transfer Service
- Background Tasks Infrastructure
- BitLocker Drive Encryption Service
- Bluetooth Audio Gateway Service
- Bluetooth Support Service
- Diagnostic Policy Service
- Distributed Link Tracking Client
- Downloaded Maps Manager
- Fax
- File History Service
- Server
- Software Protection
- Themes
- Windows Insider Service
- Windows Media Player Network
- Windows Mixed Reality OpenXR
- Work Folders
- Xbox Accessory Management Service
- Xbox Live Auth Manager
- Xbox Live Game Save
- Xbox Live Networking Service
However, it must be highlighted that this list is only a list of system services that are safe to disable on most cases, not on all cases. If you do decide to disable Windows system services, please use your common sense. For example, if you are using BitLocker encryption in your system, disabling BitLocker services is obviously a bad idea.
To test the effect on disabling unneeded Windows services to the system performance, we disabled all Diagnostics, Bluetooth, Fax, Windows Media Player, Windows Mixed Reality and Xbox related services and switched all probably unneeded services into Manual starting mode.
Before disabling unneeded Windows services, the Windows 10 test system took 39 seconds to fully boot up. After disabling the unneeded services, the system started in 38 seconds.
Tip 8: Disable Windows 10 weather and news feeds, Windows search highlights and Windows search web results
Expertise required: Low
Potential effect on performance: Low
Many users find the Windows 10 search bar images or doodles, or what is officially called the search highlights to be distracting or even annoying. The same goes to Windows 10 weather and news feeds.
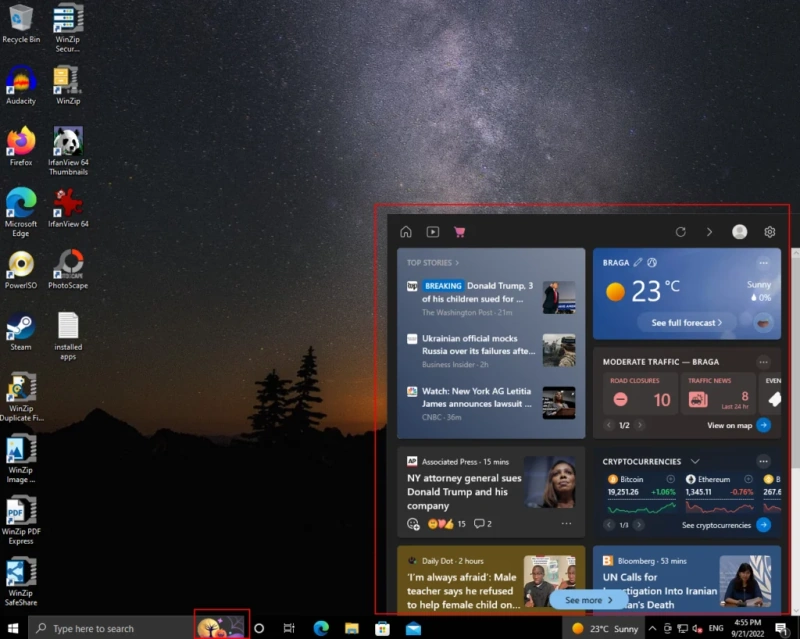
To disable the Windows 10 weather and news feeds, Right Click the Windows Taskbar and choose News and Interests > Turn Off
Then, open the Registry Editor (RegEdit.exe) and navigate to key:
HKEY_CURRENT_USER\SOFTWARE\Microsoft\Windows\CurrentVersion\Feed\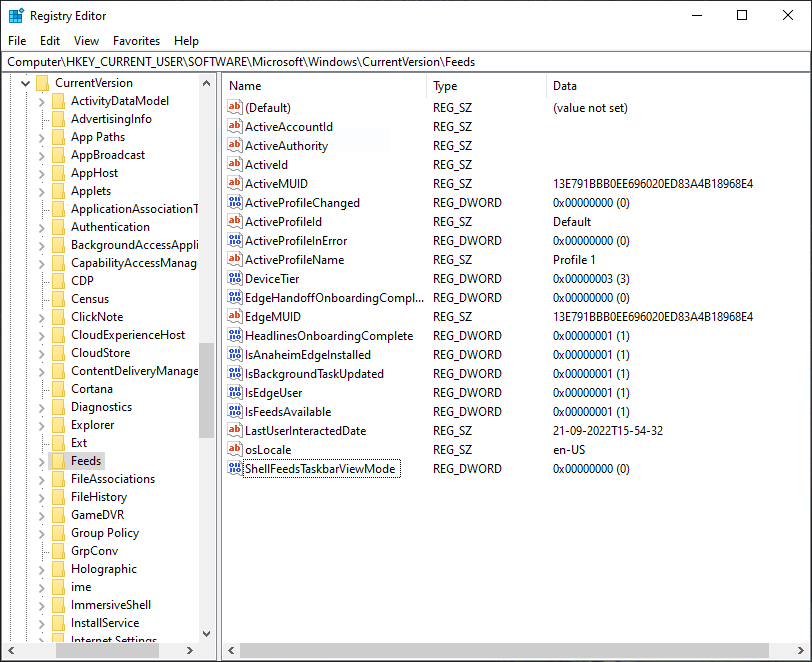
To fully disable the Windows 10 weather and news feeds, change these values to zero:
- IsAnaheimEdgeInstalled
- IsBackgroundTaskUpdated
- IsEdgeUser
- IsFeedsAvailable
- ShellFeedsTaskbarViewMode
To disable the Windows 10 search highlights, Right Click the Windows Taskbar and choose Search and uncheck Show search highlights.
Then, open the Registry Editor (RegEdit.exe) and navigate to key:
HKEY_LOCAL_MACHINE\SOFTWARE\Policies\Microsoft\Windows\Windows Search\ If the Windows Search key doesn’t exist, create it and then create the EnableDynamicContentInWSB value as a DWORD entry with a value of 0.
To disable the Windows 10 search web results, open the Registry Editor (RegEdit.exe) and navigate to key:
HKEY_CURRENT_USER\Software\Microsoft\Windows\CurrentVersion\Search\Edit the value of CortanaConsent to 0. If the entry CortanaConsent doesn’t exist, create it as a DWORD entry with a value of 0.
Before disabling Windows 10 weather and news, the system took 39 seconds to fully boot up. After disabling the unneeded services, the system started in 39 seconds.
Summary
Based on the benchmark tests we performed, we can summarize our findings as follows.
| Recommended tips | Expertise required | Potential effect on performance | How long did the system start? |
| Turn off Windows features you don’t need | Medium high | Low | 38 seconds |
| Uninstall apps you don’t need | Low | High | 29 seconds |
| Disable visual effects and animations | None | Low | 38 seconds |
| Disable search indexing | Low | Medium high | 36 seconds |
| Delete unneeded temporary files and cache files | Medium high | Low | 39 seconds |
| Disable automatically starting programs | Low | Medium high | 34 seconds |
| Disable unused Windows system services | High | Medium | 38 seconds |
| Disable Windows 10 weather and news feeds, Windows search highlights and Windows search web results | Low | Low | 39 seconds |
‘Expertise required’ is measured based on our estimation of how difficult it is to apply the tip.
The ‘Potential effect on performance’ is measured by how long the system started against the baseline system startup time, which was 39 seconds.
We concluded that uninstalling apps you don’t need is the best method to speed up your Windows 10. This method is easy to implement and it speeds up startup time by around 34%, from 39 seconds to 29 seconds.
Our other recommended methods are disabling automatically starting programs (speeds up start time by around 14%, from 39 seconds to 34 seconds), and disabling search indexing (speeds up start time by around 8%, from 39 seconds to 36 seconds).
Conclusion
In this article, we listed 8 of the most common tips on how to make Windows 10 faster. We also tested each of the tips to see exactly how much they can make Windows 10 start faster.
Don’t believe everything you read online. Instead, try things out for yourself.
If you want to see how much these tips can actually make your Windows boot up faster, we recommend you try these tips and then run Startup Timer yourself. You can download the freeware app from this link: https://startuptimer.com/