


The developer of RegCleaner, jv16 PowerTools, Uninstalr, WinFindr, Startup Timer, ScreenshotX, System Examiner and Windows Update Fixer.
Clean install refers to the process of installing Windows in a clean, blank state. This means removing all of the previous data and installed apps, and starting over with the new Windows operating system. Clean installation is different from a system upgrade where you can still retain your data in the new operating system version.
There are some cases where you need to do a clean installation, such as:
- System performance issues that can’t be fixed with regular methods
- Your computer system is under attack by computer viruses and malware
- You’re selling your computer and you need to wipe out all of your data
Bear in mind that clean install Windows 10 is a last resort and you can’t opt to save some of the data in your computer. If you want to fix system issues on your computer, while still having the option to retain your data, you should consider doing Reset your PC instead.
In this article, we’ll discuss a preparation checklist, a guide on how to perform a clean install on Windows 10, and what to do after a clean installation.
Table of Contents
What to do before clean installing Windows 10
Pre-clean install to-do list
Before doing a clean install of Windows 11, you need to make sure the following:
- Ensure that your computer meets the minimum standard requirements to run Windows 10.
- Backup your important data, preferably using a 3-2-1 backup strategy. This basically means that you need to create three data copies on two types of storage (such as using a USB flash drive and cloud storage service) in at least one off-site location.
- Have a stable internet connection.
- Have admin access.
- Have a bootable USB drive that contains a Windows media creation tool. The USB drive should have at least 8GB of storage and is preferably a blank USB drive because any data that remains in the drive will be deleted during the creation process.
- Make sure that you select the same language you chose for your current system.
- Take note of the current Windows 10 installed on your computer. You can do this by going to the Settings menu > select System > select About. You should find your Windows 10 edition under the Windows specifications menu. Once you find it, make sure that the Windows edition you’re going to clean install matches your old edition.
Create Windows 10 Media Creation Tool
Creating an installation media using the Windows Media Creation tool is an important step in the clean installation process. Here’s how you can do it:
- Download the Windows 10 media creation tool from its official website.
- Once it’s done, you can run the Media Creation Tool file.
- Read through the Microsoft Software License Terms and if it looks good for you, click the “Accept” button.

- In the new screen, select “Create installation media (USB flash drive, DVD, or ISO file) for another PC > click “Next”.

- Select the language and edition of Windows 10 > click the “Next” button.
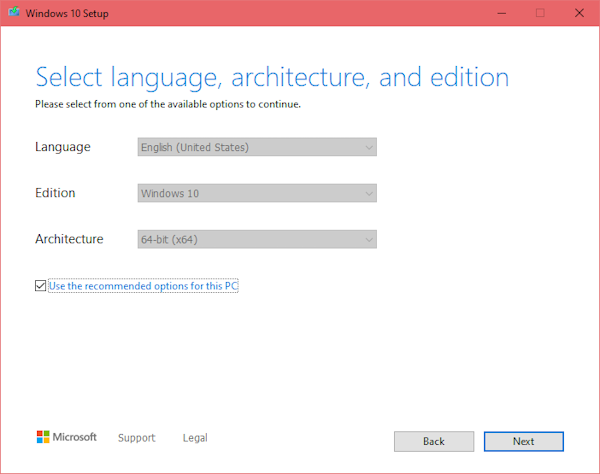
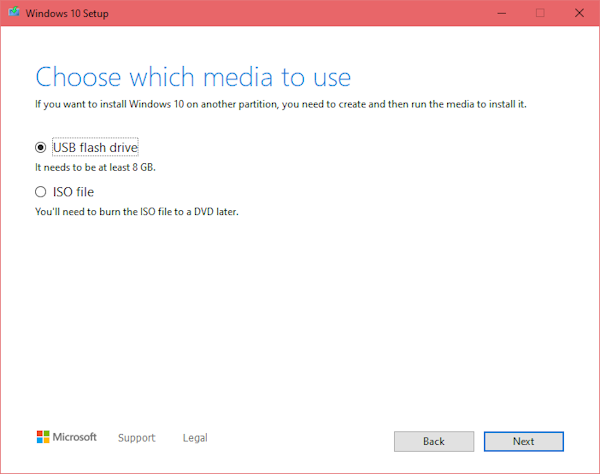
- Select which external drive you want to choose as an installation media. You can use a blank USB flash drive with at least 8GB storage or an ISO file (you’ll need to burn the ISO file to a DVD later) > click the “Next” button. Bear in mind that if you opt for a blank USB flash drive, the device will be formatted and all of the data inside will be deleted.
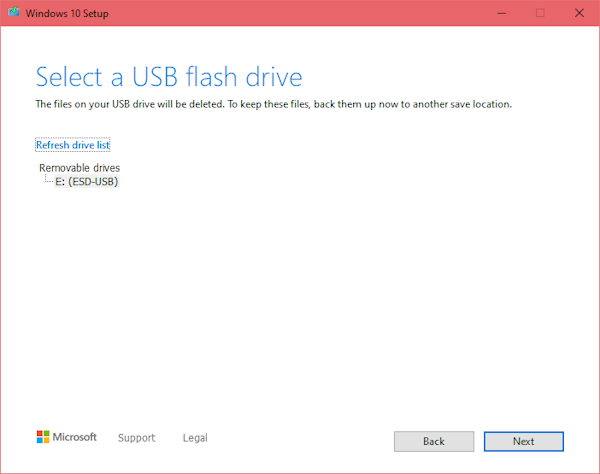
- Choose the target drive from the list and click the “Next” button. Then wait for the media creation download process.
- Once it’s done, click the “Finish” button. Now you have a bootable installation media.
How to do Clean Install Windows 10
Here’s how you can do a clean install of Windows 10:
- Plug in the external drive where you saved the Media Creation Tool. This could be a bootable USB drive from the previous step, for example.
- Restart your computer. Your computer should automatically boot the USB drive, if this isn’t the case, please consult this page for troubleshooting info.
- You’ll be redirected to the Windows Setup page where you can choose the language, time and currency format, and keyboard settings. Once you’re done, click the “Next” button.
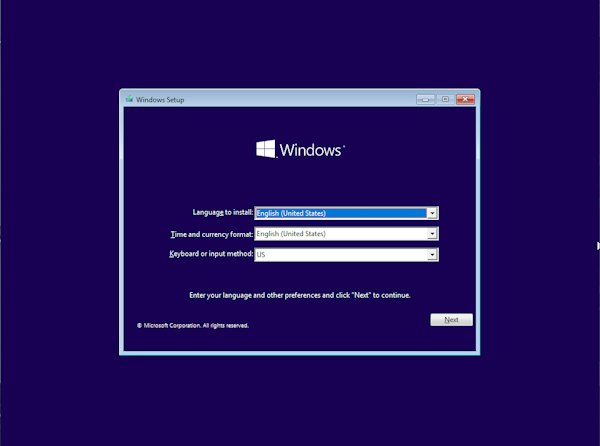
- In the new screen, click the “Install now” button.
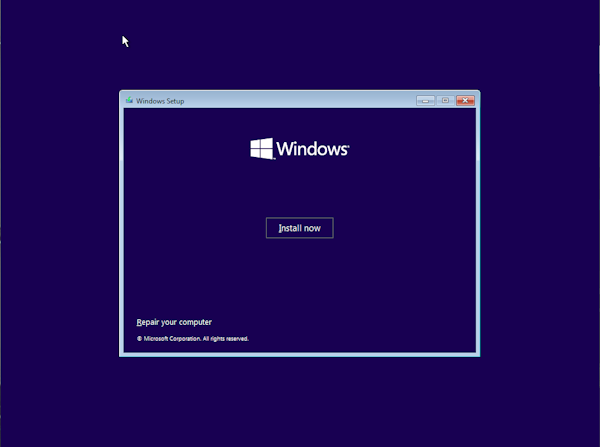
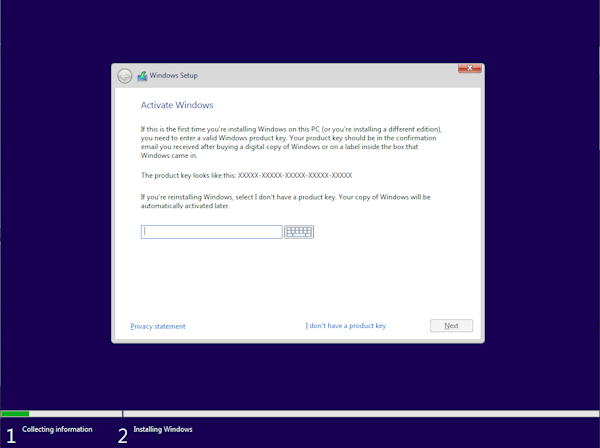
- If you’re reinstalling the same edition of Windows, select the “I don’t have a product key” option. This will automatically activate the copy of your Windows once you reconnect your Microsoft account.
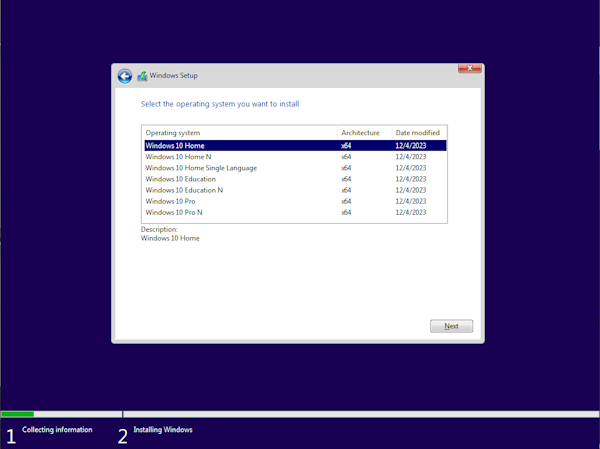
- Choose the Windows edition you got from the previous pre-install checklist > click the “Next” button.
- Read through the Microsoft Software License Terms and if it looks good for you, tick the “I accept the license terms” box and click “Next”.

- You’ll be asked about the type of installation you want to do. Select the “Custom: Install Windows only (advanced)” option to proceed with the clean installation.

- Choose the partition drive where you want to clean install Windows 10 then select the “Next” button.

- Wait for the clean install process to complete.

- When the Windows installation process is done, your computer will restart. Wait until it fully boots.
- After reboot, a new screen will appear. Select the region and click “Yes”.
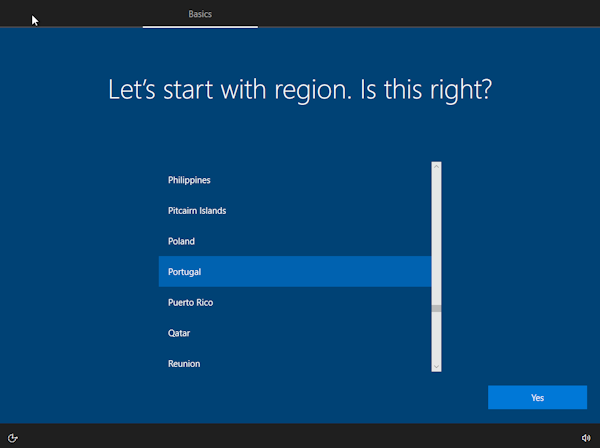
- Select your keyboard layout and click “Yes”.

- Add a second keyboard layout if needed in the next step, otherwise, you can click “Skip”.
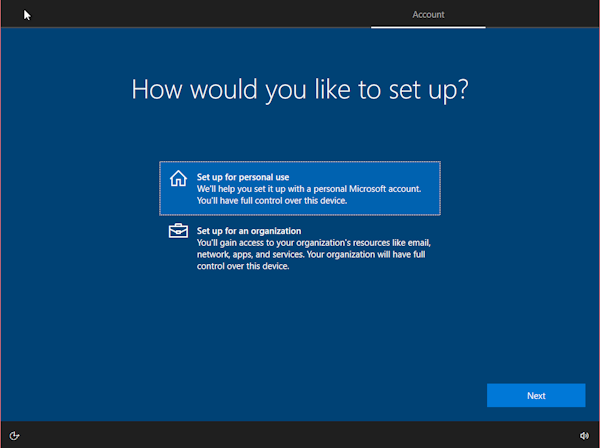
- Choose how you want to set up your computer and then click the “Next” button.
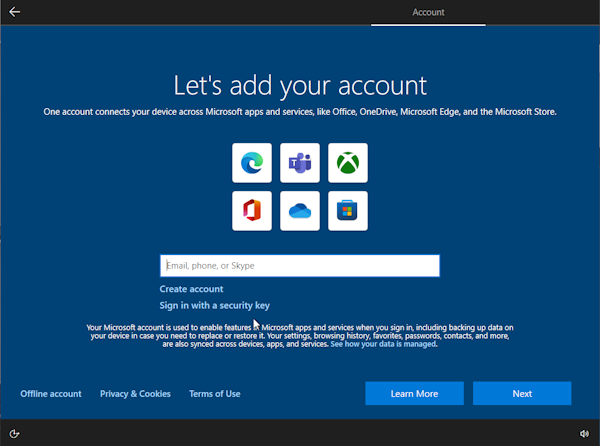
- Sign in to your Microsoft account and then click “Next”.
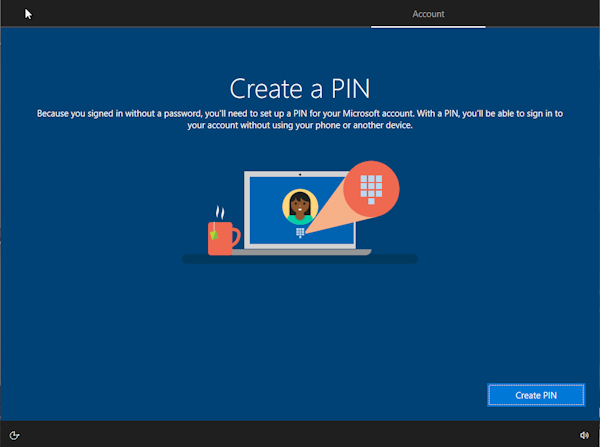
- Create a PIN by clicking the “Create PIN” button.
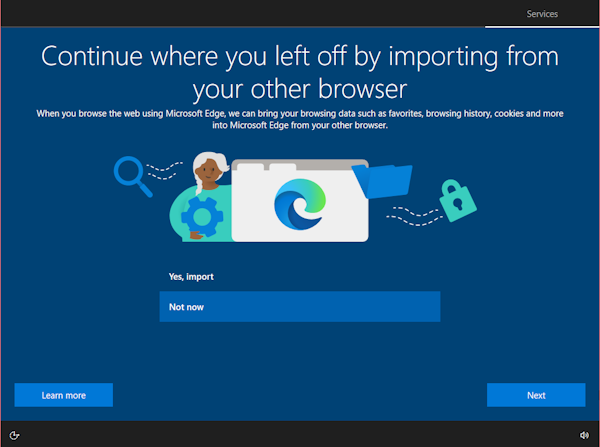
- Choose whether you want to import your browsing history from Microsoft Edge. Once you select an option, click the “Next” button.
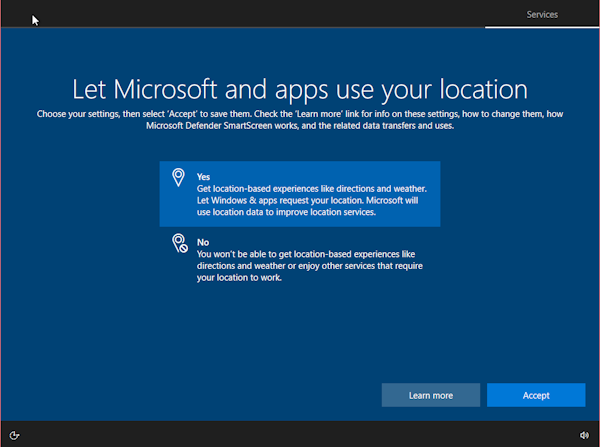
- Choose whether you want to allow Microsoft to access your location or not, then click “Accept”.
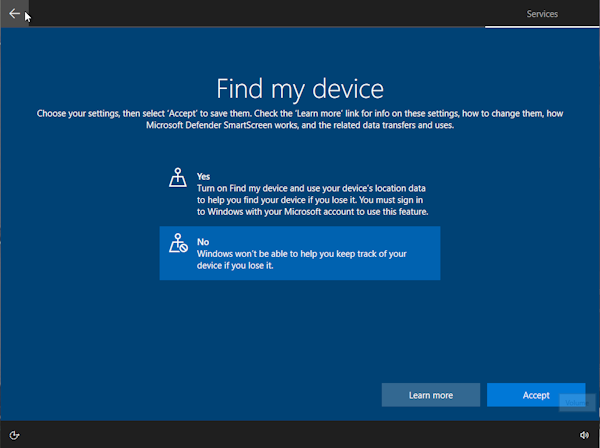
- Choose whether you want to activate the “Find my device” feature, and then click “Accept”.
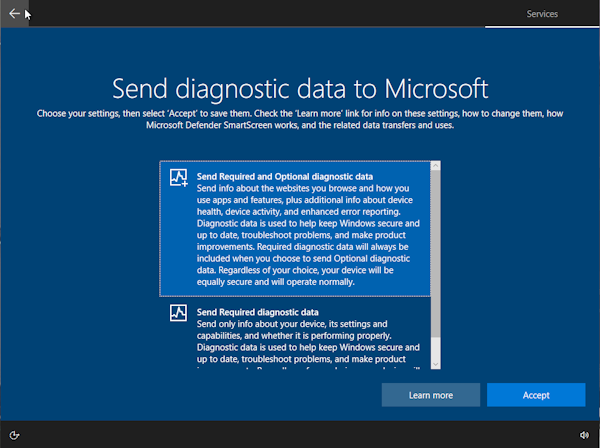
- Choose whether you want to send diagnostic data to Microsoft and then click the “Accept” button.
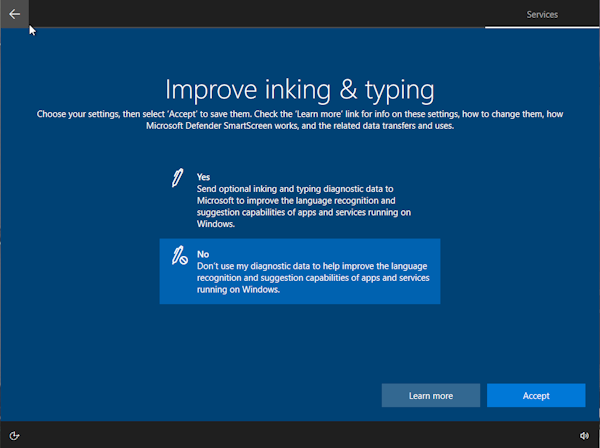
- Choose whether you want to send optional inking and typing diagnostic data to Microsoft, then click “Accept”.
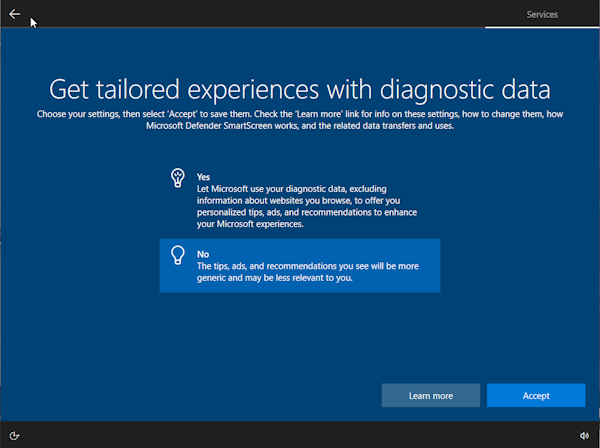
- Choose whether you want to have tailored experiences with diagnostic data, then click “Accept”.
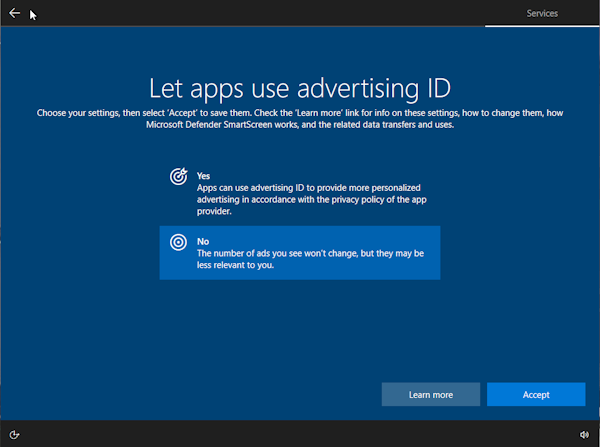
- Choose whether you want to let apps use advertising ID then click “Accept”.
- Choose whether you want Microsoft to customize your experience. You can either hit the “Skip” button or choose one option and then click “Accept”.

- Choose whether you want to link your mobile device with your computer. If you do, click the “Remind me later” button, otherwise select “No, thanks”.

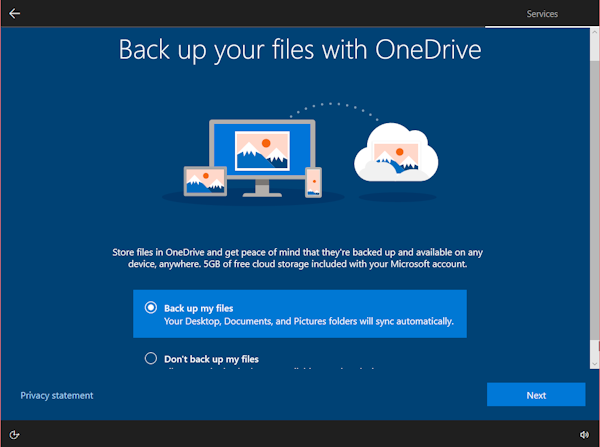
- Choose whether you want to back up your files on OneDrive and then hit “Next”.
- Lastly, you’ll be given information about Microsoft 365. You can accept the offer or ignore the message.
- Your computer will wrap up the clean reinstall process, wait until it’s finished.
What to do after clean install Windows 10
After clean installation, you need to do the following to ensure your system runs in peak conditions:
- Run initial system updates and then regularly check for new updates by accessing the “Windows Update” menu from settings. You can also adjust how and when you want to install updates under the ‘Advanced options’ menu in Windows Update.
- Make sure that you have the latest driver updates. You can do this by following the instructions in this help article.
- Make sure that Windows Security is activated. You can check this by accessing the Settings menu > Windows Security > Virus & Threat Protection. You can check for current threats by clicking the “Quick scan” button in the virus & threat protection menu
Conclusion
Clean Install Windows 10 is an alternative you can try if you want to fix performance issues, or when you want to run Windows 10 in a fresh state.
You can easily perform a clean installation using a bootable USB drive which contains Windows Media Creation and the steps to do it are quite straightforward as described above.
However, you need to do some preparation before clean installation and perform some extra steps after installation to make sure your system runs smoothly.
If you find this article useful, please consider sharing this on your social media and browse through our Tips & Tricks section for more information to make your Windows experience better.